> ## Documentation Index
> Fetch the complete documentation index at: https://www.conductor.com/docs/llms.txt
> Use this file to discover all available pages before exploring further.
# Custom Connectors
> How to connect Conductor's MCP to AI platforms beyond the ones we document directly.
Conductor's MCP is designed to meet your workflows where they take place. It's built to work anywhere your AI workflows and automation live. Whether you're building automations, agents, or custom pipelines, Conductor's data and insights can plug directly into the tools your team already relies on.
We've validated tools like [Abacus](#connect-abacus-with-conductor), [LibreChat](#connect-librechat-with-conductor), [Lovable](#connect-lovable-with-conductor), [n8n](#connect-n8n-with-conductor), [Notion](#connect-notion-with-conductor), and [Replit](#connect-replit-with-conductor)—but these are just examples of what's possible. Because Conductor MCP connections can be made with API token, connections can extend to virtually any platform that supports token-based authentication, including workflow builders, IDEs, and automation tools like Replit and Cursor, coming soon.
If you have issues with the tool you want to connect, [contact Conductor](mailto:support@conductor.com)—we can work with you to get you connected.
## Authenticating Custom Connections
Conductor supports OAuth, Bearer, or Header authentication.
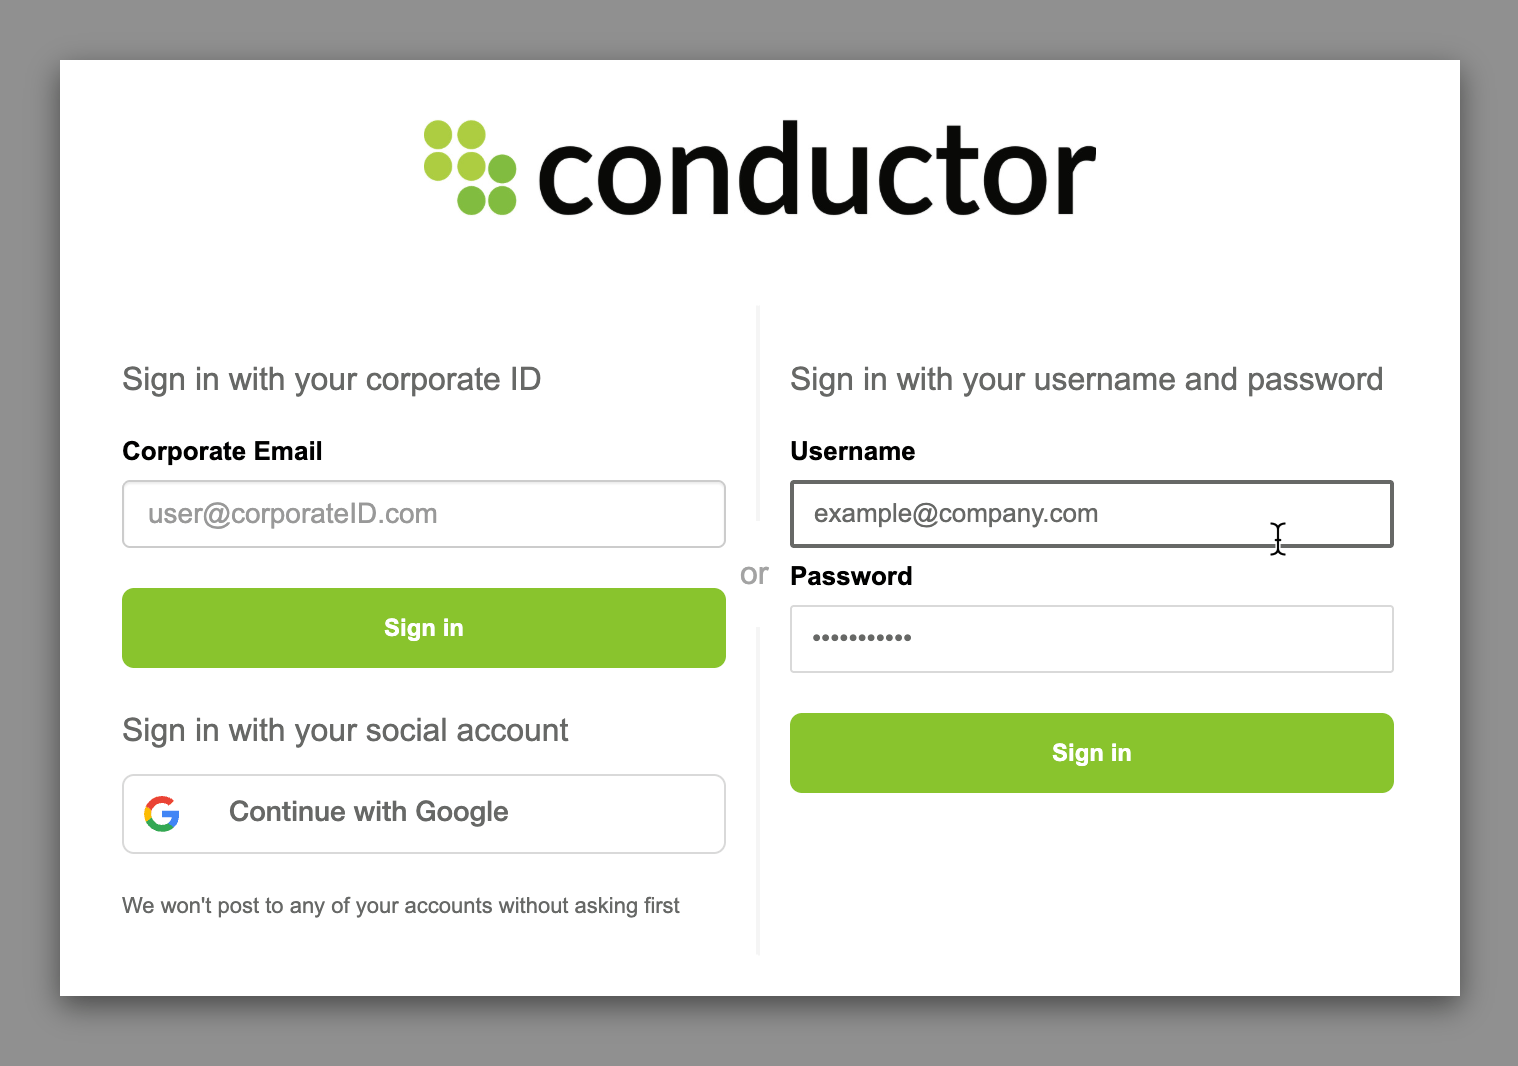
Conductor supports OAuth connections to ChatGPT, Claude, and Perplexity. For these platforms, simply use your Conductor platform credentials to sign in.
 If the platform you want to connect to Conductor's MCP server supports Bearer token authentication, enter your Conductor API token to authenticate.
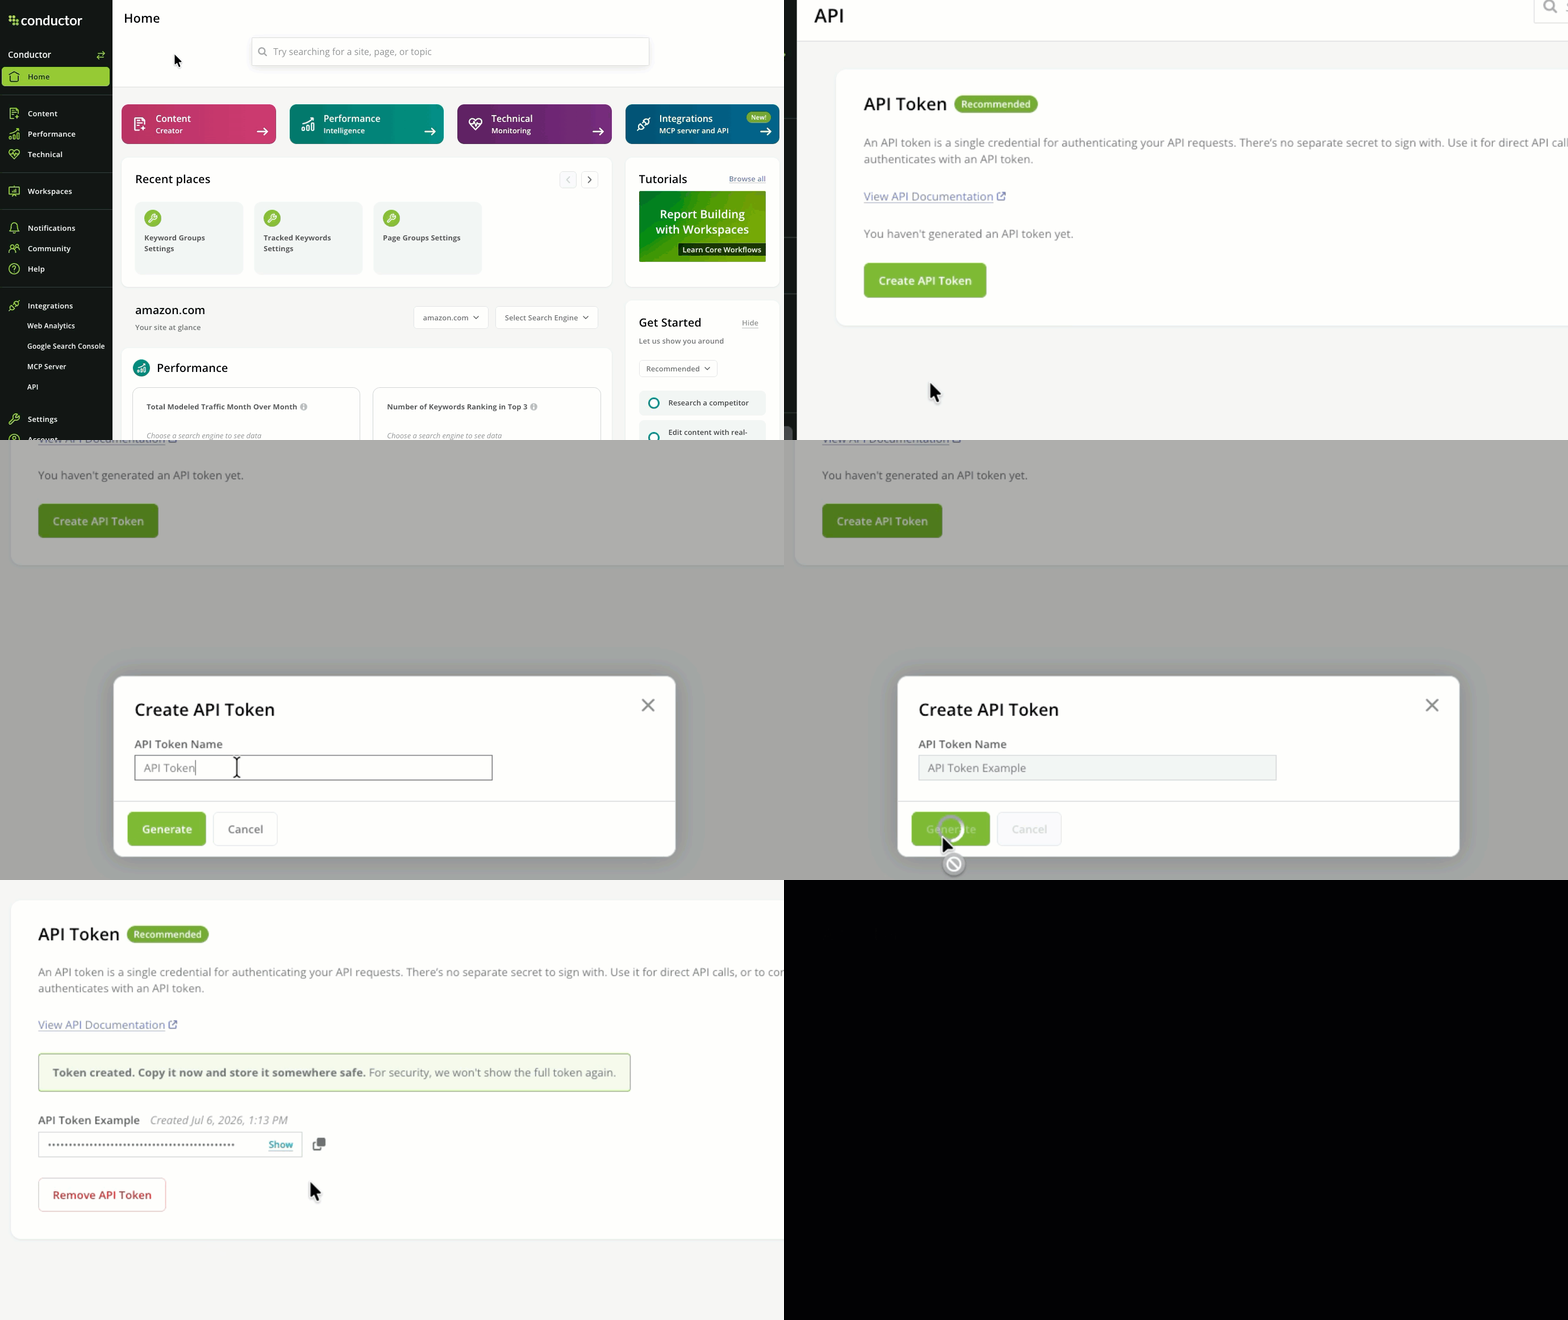
To generate or copy your Conductor API token:
1. In Conductor, follow the path **Integrations** > **API**.
2. In the **API Token** section, click **Create API Token**.
3. In the form that appears, give your token a name and click **Generate**.
4. Copy the generated token. Its full string won't be shown again.
If the platform you want to connect to Conductor's MCP server supports Bearer token authentication, enter your Conductor API token to authenticate.
To generate or copy your Conductor API token:
1. In Conductor, follow the path **Integrations** > **API**.
2. In the **API Token** section, click **Create API Token**.
3. In the form that appears, give your token a name and click **Generate**.
4. Copy the generated token. Its full string won't be shown again.
 If the platform you want to connect to Conductor's MCP server doesn't support Bearer token authentication, you can pass your Conductor API token as a `Authorization`-type Header. Just prepend `Bearer ` to the token value:
```
{
Authorization: Bearer YOUR_CONDUCTOR_API_TOKEN
}
```
To generate or copy your Conductor API token:
1. In Conductor, follow the path **Integrations** > **API**.
2. In the **API Token** section, click **Create API Token**.
3. In the form that appears, give your token a name and click **Generate**.
4. Copy the generated token. Its full string won't be shown again.
## Examples for connecting Conductor's MCP to other platforms
The examples below show how to connect each platform to Conductor's MCP server using your Conductor API token. In every case, the MCP server URL is `https://mcp-universal.conductor.com/mcp/v3`, and you'll authenticate with the API token generated above.
These directions describe the general approach for each platform. The exact labels and menu locations may change as these third-party tools evolve—consult each platform's own documentation to be sure.
Abacus.AI's ChatLLM lets you register remote MCP servers from its agent settings.
1. In Abacus.AI, open **Agent Settings** and select **MCP Server Config** from the sidebar.
2. Add a JSON entry for Conductor that includes the server URL and an `Authorization` header carrying your API token:
```json theme={null}
{
"conductor": {
"url": "https://mcp-universal.conductor.com/mcp/v3",
"headers": {
"Authorization": "Bearer YOUR_CONDUCTOR_API_TOKEN"
}
}
}
```
3. Save the configuration. Abacus queries the server and lists Conductor's available tools.
For more details, see [Abacus.AI's MCP Servers documentation](https://abacus.ai/help/chatllm-ai-super-assistant/mcp-servers/).
LibreChat connects to remote MCP servers through the `mcpServers` block in your `librechat.yaml` file.
1. Open your `librechat.yaml` configuration file.
2. Add Conductor as a `streamable-http` server, passing your API token in the `Authorization` header. Set `requiresOAuth: false` so LibreChat uses your header instead of attempting an OAuth flow:
```yaml theme={null}
mcpServers:
conductor:
type: streamable-http
url: https://mcp-universal.conductor.com/mcp/v3
requiresOAuth: false
headers:
Authorization: "Bearer YOUR_CONDUCTOR_API_TOKEN"
```
3. Restart LibreChat so it picks up the new server, then select **Conductor** in the MCP menu.
For more details, see [LibreChat's MCP servers documentation](https://www.librechat.ai/docs/configuration/librechat_yaml/object_structure/mcp_servers).
Lovable connects to MCP servers as "chat connectors." Custom MCP servers are available on paid plans.
1. In Lovable, open **Connectors** and go to **Chat connectors**.
2. Click **New MCP server**.
3. Enter a **Server name** (for example, `Conductor`) and set the **Server URL** to `https://mcp-universal.conductor.com/mcp/v3`.
4. Under **Authentication**, choose **Bearer token or API key** and paste your Conductor API token.
5. Click **Add server**. Conductor now appears in your list of chat connectors.
For more details, see [Lovable's MCP servers documentation](https://docs.lovable.dev/integrations/mcp-servers).
In n8n, use the **MCP Client Tool** node to expose Conductor's tools to an AI agent.
1. Add an **MCP Client Tool** node to your workflow and connect it to your AI Agent node.
2. Set the **SSE Endpoint** (server URL) to `https://mcp-universal.conductor.com/mcp/v3`.
3. Set **Authentication** to **Bearer Auth**, then create a credential whose token is your Conductor API token. If you prefer to send the token yourself, choose **Header Auth** and add an `Authorization` header with the value `Bearer YOUR_CONDUCTOR_API_TOKEN`.
4. Save and execute the workflow. The agent can now call Conductor's tools.
For more details, see [n8n's MCP Client Tool documentation](https://docs.n8n.io/integrations/builtin/cluster-nodes/sub-nodes/n8n-nodes-langchain.toolmcp/).
Notion supports custom MCP servers for Custom Agents once an admin enables the feature.
1. A workspace admin enables custom connections in **Settings** > **Notion AI** > **AI connectors** > **Enable Custom MCP servers**.
2. Open your Custom Agent's **Settings** and go to **Tools & Access**.
3. Click **Add connection** > **Custom MCP server**.
4. Enter the MCP server URL `https://mcp-universal.conductor.com/mcp/v3` and a display name (for example, `Conductor`).
5. When prompted for authentication, choose header-based auth and add an `Authorization` header with the value `Bearer YOUR_CONDUCTOR_API_TOKEN`.
6. Click **Save**. Conductor's tools become available to the agent.
For more details, see [Notion's MCP connections for Custom Agents documentation](https://www.notion.com/help/mcp-connections-for-custom-agents).
Replit Agent can connect to any MCP server you add by URL.
1. In Replit, open the **MCP Servers** settings pane and click **Add MCP server**.
2. Paste the server URL `https://mcp-universal.conductor.com/mcp/v3`.
3. Open **Advanced settings** and add a custom header:
* **Key**: `Authorization`
* **Value**: `Bearer YOUR_CONDUCTOR_API_TOKEN`
4. Click **Test & save**. Once the connection succeeds, Conductor appears under **MCP Servers** and its tools are available to Agent.
For more details, see [Replit's Connect via MCP documentation](https://docs.replit.com/build/connect-via-mcp).
If the platform you want to connect to Conductor's MCP server doesn't support Bearer token authentication, you can pass your Conductor API token as a `Authorization`-type Header. Just prepend `Bearer ` to the token value:
```
{
Authorization: Bearer YOUR_CONDUCTOR_API_TOKEN
}
```
To generate or copy your Conductor API token:
1. In Conductor, follow the path **Integrations** > **API**.
2. In the **API Token** section, click **Create API Token**.
3. In the form that appears, give your token a name and click **Generate**.
4. Copy the generated token. Its full string won't be shown again.
## Examples for connecting Conductor's MCP to other platforms
The examples below show how to connect each platform to Conductor's MCP server using your Conductor API token. In every case, the MCP server URL is `https://mcp-universal.conductor.com/mcp/v3`, and you'll authenticate with the API token generated above.
These directions describe the general approach for each platform. The exact labels and menu locations may change as these third-party tools evolve—consult each platform's own documentation to be sure.
Abacus.AI's ChatLLM lets you register remote MCP servers from its agent settings.
1. In Abacus.AI, open **Agent Settings** and select **MCP Server Config** from the sidebar.
2. Add a JSON entry for Conductor that includes the server URL and an `Authorization` header carrying your API token:
```json theme={null}
{
"conductor": {
"url": "https://mcp-universal.conductor.com/mcp/v3",
"headers": {
"Authorization": "Bearer YOUR_CONDUCTOR_API_TOKEN"
}
}
}
```
3. Save the configuration. Abacus queries the server and lists Conductor's available tools.
For more details, see [Abacus.AI's MCP Servers documentation](https://abacus.ai/help/chatllm-ai-super-assistant/mcp-servers/).
LibreChat connects to remote MCP servers through the `mcpServers` block in your `librechat.yaml` file.
1. Open your `librechat.yaml` configuration file.
2. Add Conductor as a `streamable-http` server, passing your API token in the `Authorization` header. Set `requiresOAuth: false` so LibreChat uses your header instead of attempting an OAuth flow:
```yaml theme={null}
mcpServers:
conductor:
type: streamable-http
url: https://mcp-universal.conductor.com/mcp/v3
requiresOAuth: false
headers:
Authorization: "Bearer YOUR_CONDUCTOR_API_TOKEN"
```
3. Restart LibreChat so it picks up the new server, then select **Conductor** in the MCP menu.
For more details, see [LibreChat's MCP servers documentation](https://www.librechat.ai/docs/configuration/librechat_yaml/object_structure/mcp_servers).
Lovable connects to MCP servers as "chat connectors." Custom MCP servers are available on paid plans.
1. In Lovable, open **Connectors** and go to **Chat connectors**.
2. Click **New MCP server**.
3. Enter a **Server name** (for example, `Conductor`) and set the **Server URL** to `https://mcp-universal.conductor.com/mcp/v3`.
4. Under **Authentication**, choose **Bearer token or API key** and paste your Conductor API token.
5. Click **Add server**. Conductor now appears in your list of chat connectors.
For more details, see [Lovable's MCP servers documentation](https://docs.lovable.dev/integrations/mcp-servers).
In n8n, use the **MCP Client Tool** node to expose Conductor's tools to an AI agent.
1. Add an **MCP Client Tool** node to your workflow and connect it to your AI Agent node.
2. Set the **SSE Endpoint** (server URL) to `https://mcp-universal.conductor.com/mcp/v3`.
3. Set **Authentication** to **Bearer Auth**, then create a credential whose token is your Conductor API token. If you prefer to send the token yourself, choose **Header Auth** and add an `Authorization` header with the value `Bearer YOUR_CONDUCTOR_API_TOKEN`.
4. Save and execute the workflow. The agent can now call Conductor's tools.
For more details, see [n8n's MCP Client Tool documentation](https://docs.n8n.io/integrations/builtin/cluster-nodes/sub-nodes/n8n-nodes-langchain.toolmcp/).
Notion supports custom MCP servers for Custom Agents once an admin enables the feature.
1. A workspace admin enables custom connections in **Settings** > **Notion AI** > **AI connectors** > **Enable Custom MCP servers**.
2. Open your Custom Agent's **Settings** and go to **Tools & Access**.
3. Click **Add connection** > **Custom MCP server**.
4. Enter the MCP server URL `https://mcp-universal.conductor.com/mcp/v3` and a display name (for example, `Conductor`).
5. When prompted for authentication, choose header-based auth and add an `Authorization` header with the value `Bearer YOUR_CONDUCTOR_API_TOKEN`.
6. Click **Save**. Conductor's tools become available to the agent.
For more details, see [Notion's MCP connections for Custom Agents documentation](https://www.notion.com/help/mcp-connections-for-custom-agents).
Replit Agent can connect to any MCP server you add by URL.
1. In Replit, open the **MCP Servers** settings pane and click **Add MCP server**.
2. Paste the server URL `https://mcp-universal.conductor.com/mcp/v3`.
3. Open **Advanced settings** and add a custom header:
* **Key**: `Authorization`
* **Value**: `Bearer YOUR_CONDUCTOR_API_TOKEN`
4. Click **Test & save**. Once the connection succeeds, Conductor appears under **MCP Servers** and its tools are available to Agent.
For more details, see [Replit's Connect via MCP documentation](https://docs.replit.com/build/connect-via-mcp).