> ## Documentation Index
> Fetch the complete documentation index at: https://www.conductor.com/docs/llms.txt
> Use this file to discover all available pages before exploring further.
# Setting Up the Cloudflare Logpush Integration
> Stream Cloudflare Logpush data into Conductor Monitoring (Enterprise plan) to enable Log File Analysis.
Setting up Log File Analysis with [Cloudflare Logpush](https://developers.cloudflare.com/logs/about/) in Conductor Monitoring is very straightforward! Follow the steps outlined below to enable Log File Analysis in Conductor Monitoring, and set up the Logpush integration.
### Important
Cloudflare Logpush is available exclusively on Cloudflare's **Enterprise** plan.
If your Cloudflare account is not on the Enterprise plan, you can integrate with Cloudflare with the [Cloudflare Worker](/docs/monitoring/setting-up-the-cloudflare-worker-integration/) instead.
## Setting up the Log File Analysis
The process of configuring the Log File Analysis consists of two phases:
* Enabling the Log File Analysis feature and creating an [AWS S3 bucket](https://aws.amazon.com/s3/) in Conductor Monitoring
* Configuring Logpush in the Cloudflare UI
### 1. Enabling the Log File Analysis feature and creating an AWS S3 bucket in Conductor Monitoring
If you navigate to **Account** and then **Websites** section in Conductor Monitoring, you can easily filter and see which of the websites you are monitoring in Conductor Monitoring are on Cloudflare:\\
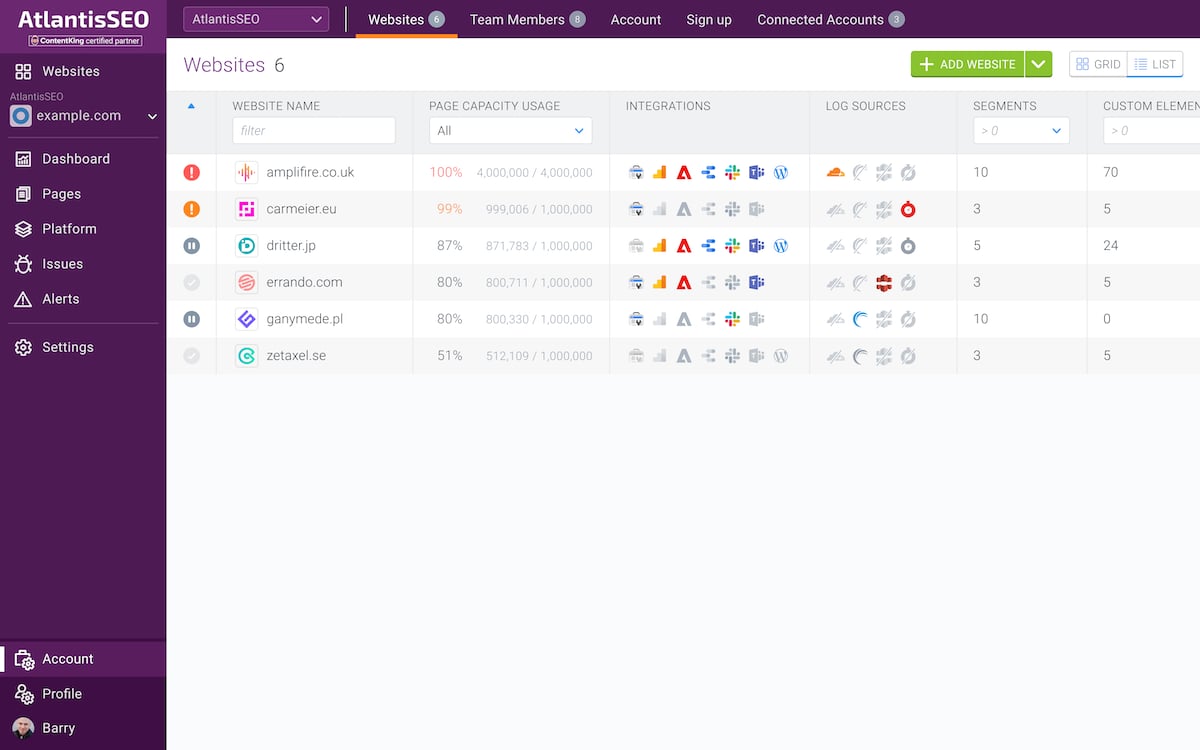 From there, just follow the steps outlined below to enable Log File Analysis on the wanted website:
1. Click any website that is running on Cloudflare in the [Websites section](https://app.contentkingapp.com/account/websites?view=list) of Conductor Monitoring.
2. Click the **Log File Analysis** tab in **Settings**.
3. Enable the **Log File Analysis** toggle.
After this is done, follow the next steps to create an AWS S3 bucket in Conductor Monitoring:
1. In the same **Log File Analysis** section, select **Cloudflare Logpush** as the delivery method.
2. Click the **How to install** link next to Cloudflare Logpush.
3. Specify in which region should the AWS S3 bucket be created (EU or US) and click **Create bucket**.
4. After this, Conductor Monitoring will automatically generate the AWS credentials and the AWS S3 bucket.
5. Save the credentials as they will be used to associate the AWS S3 bucket with the Cloudflare Logpush service in the next section.
### 2. Configuring Cloudflare Logpush
Cloudflare Logpush needs to be manually configured in the Cloudflare UI for every website. The configuration of Logpush consists of the following steps:
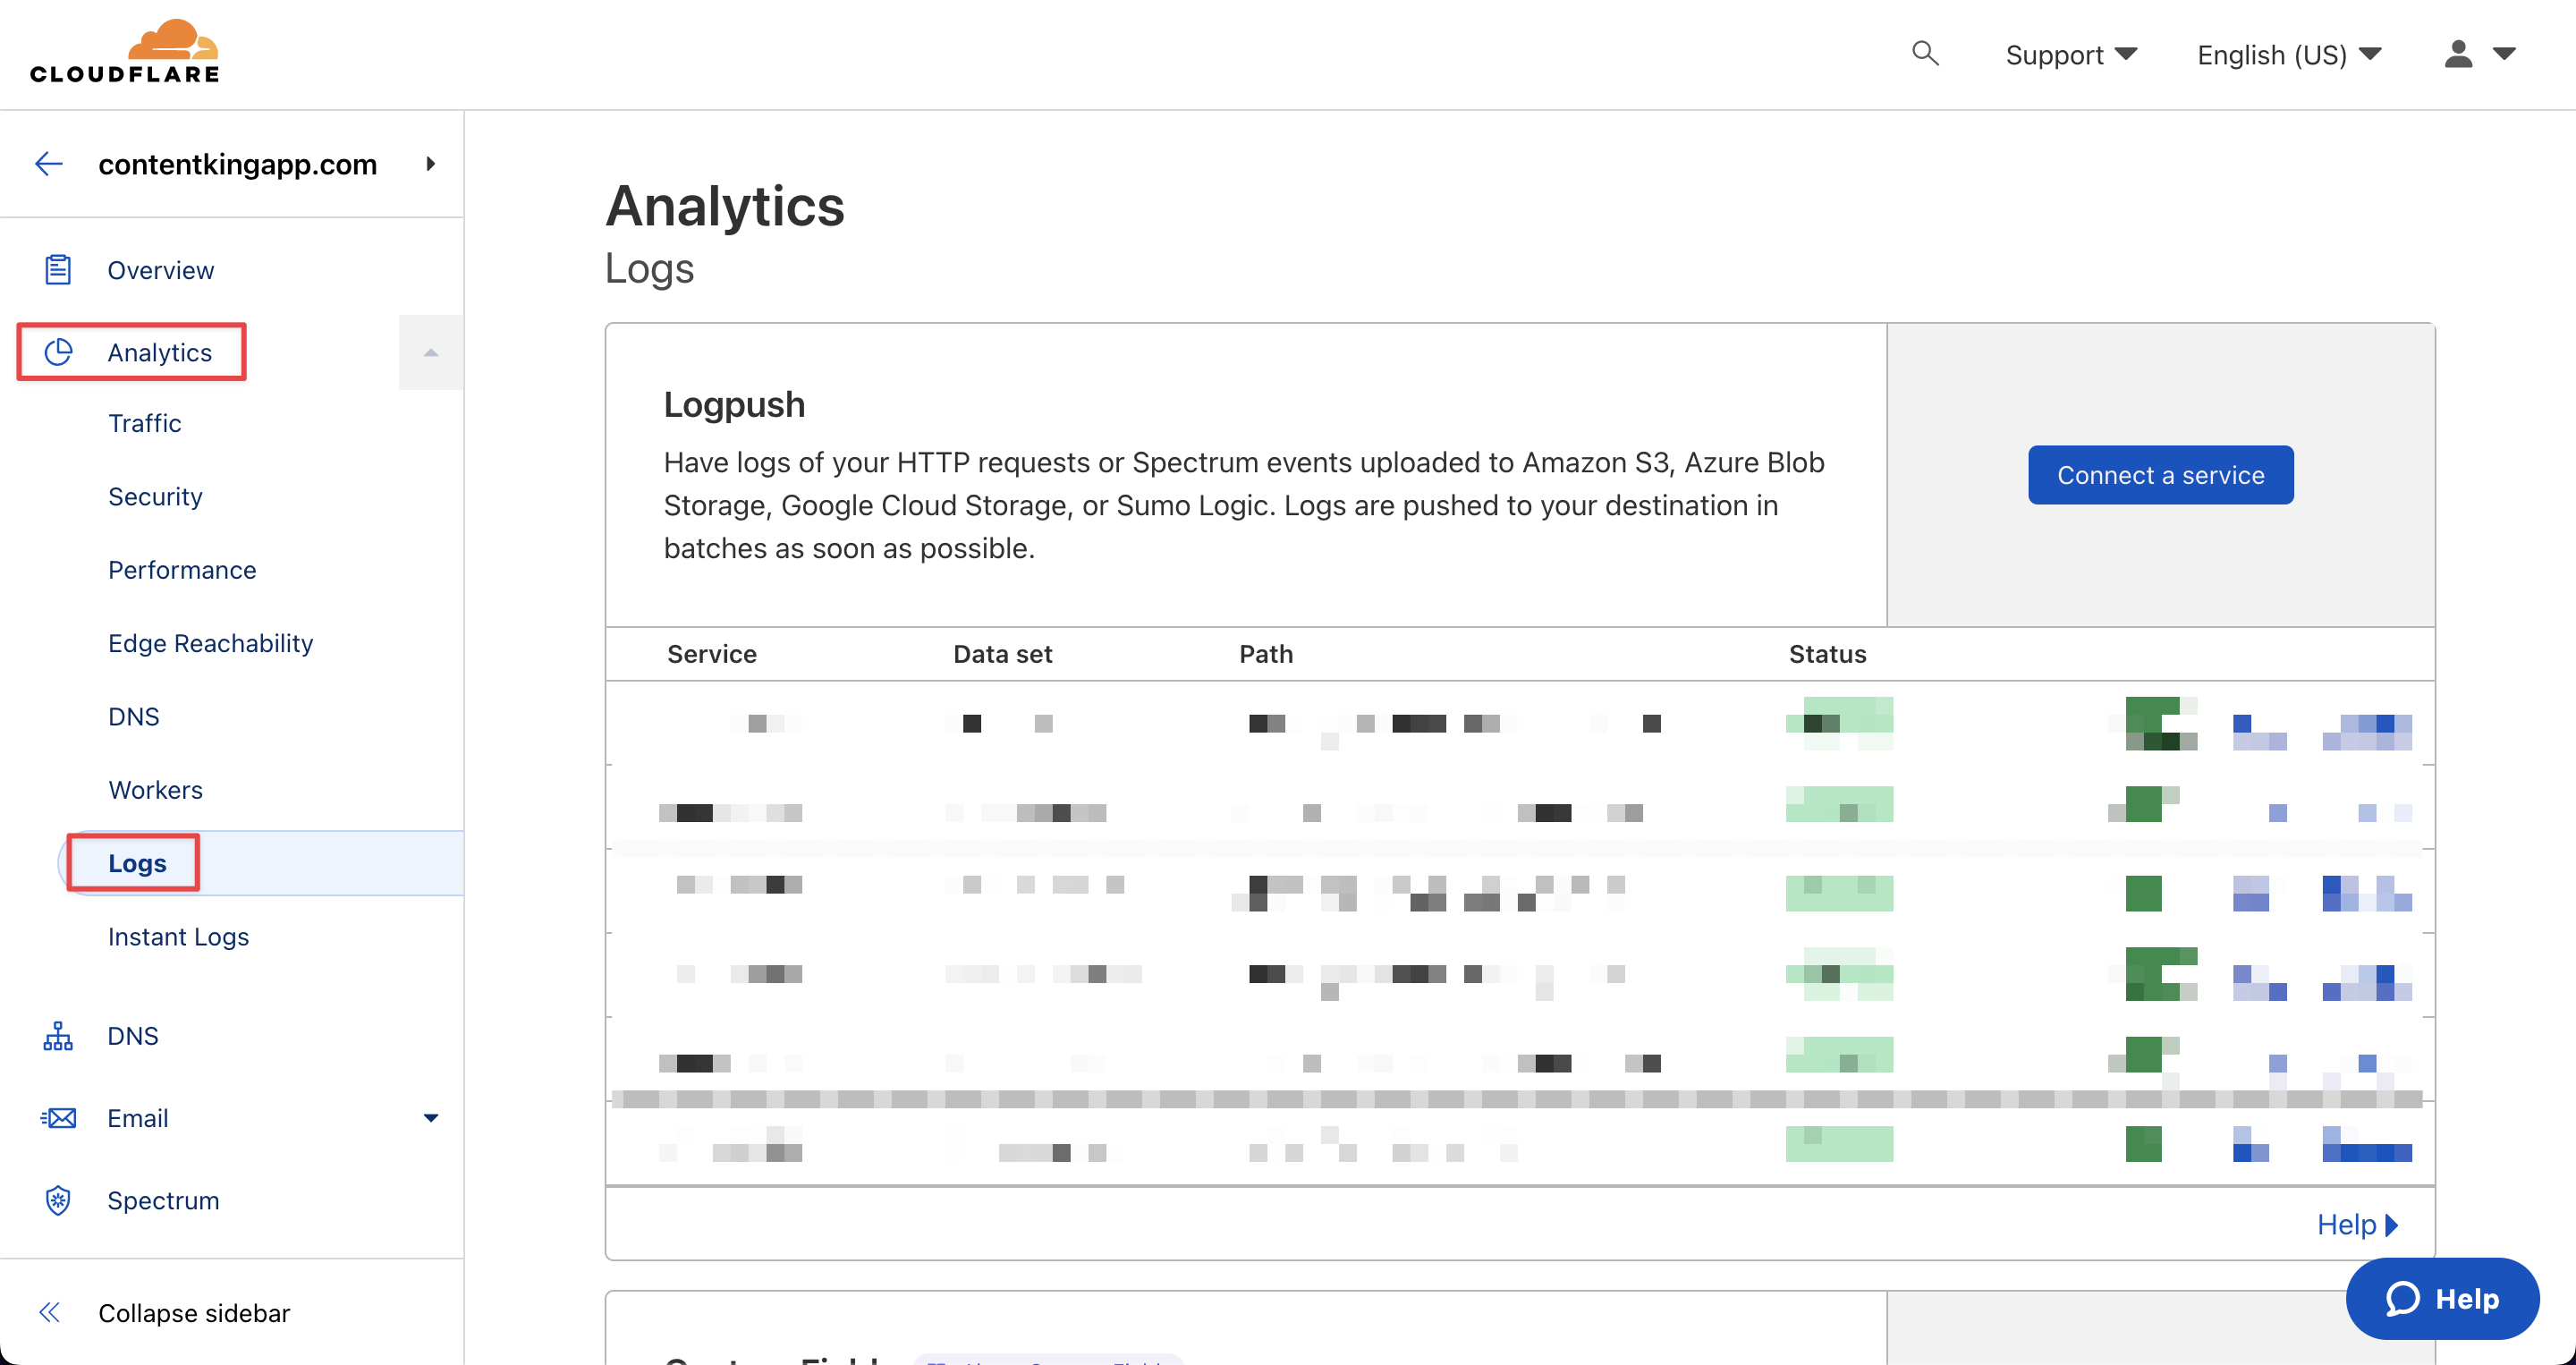
1. Go to the **Logs** section in the Cloudflare UI: Log in to your Cloudflare account, choose the website for which you want to enable the Log File Analysis feature, and click on **Analytics** > **Logs**.\\
From there, just follow the steps outlined below to enable Log File Analysis on the wanted website:
1. Click any website that is running on Cloudflare in the [Websites section](https://app.contentkingapp.com/account/websites?view=list) of Conductor Monitoring.
2. Click the **Log File Analysis** tab in **Settings**.
3. Enable the **Log File Analysis** toggle.
After this is done, follow the next steps to create an AWS S3 bucket in Conductor Monitoring:
1. In the same **Log File Analysis** section, select **Cloudflare Logpush** as the delivery method.
2. Click the **How to install** link next to Cloudflare Logpush.
3. Specify in which region should the AWS S3 bucket be created (EU or US) and click **Create bucket**.
4. After this, Conductor Monitoring will automatically generate the AWS credentials and the AWS S3 bucket.
5. Save the credentials as they will be used to associate the AWS S3 bucket with the Cloudflare Logpush service in the next section.
### 2. Configuring Cloudflare Logpush
Cloudflare Logpush needs to be manually configured in the Cloudflare UI for every website. The configuration of Logpush consists of the following steps:
1. Go to the **Logs** section in the Cloudflare UI: Log in to your Cloudflare account, choose the website for which you want to enable the Log File Analysis feature, and click on **Analytics** > **Logs**.\\
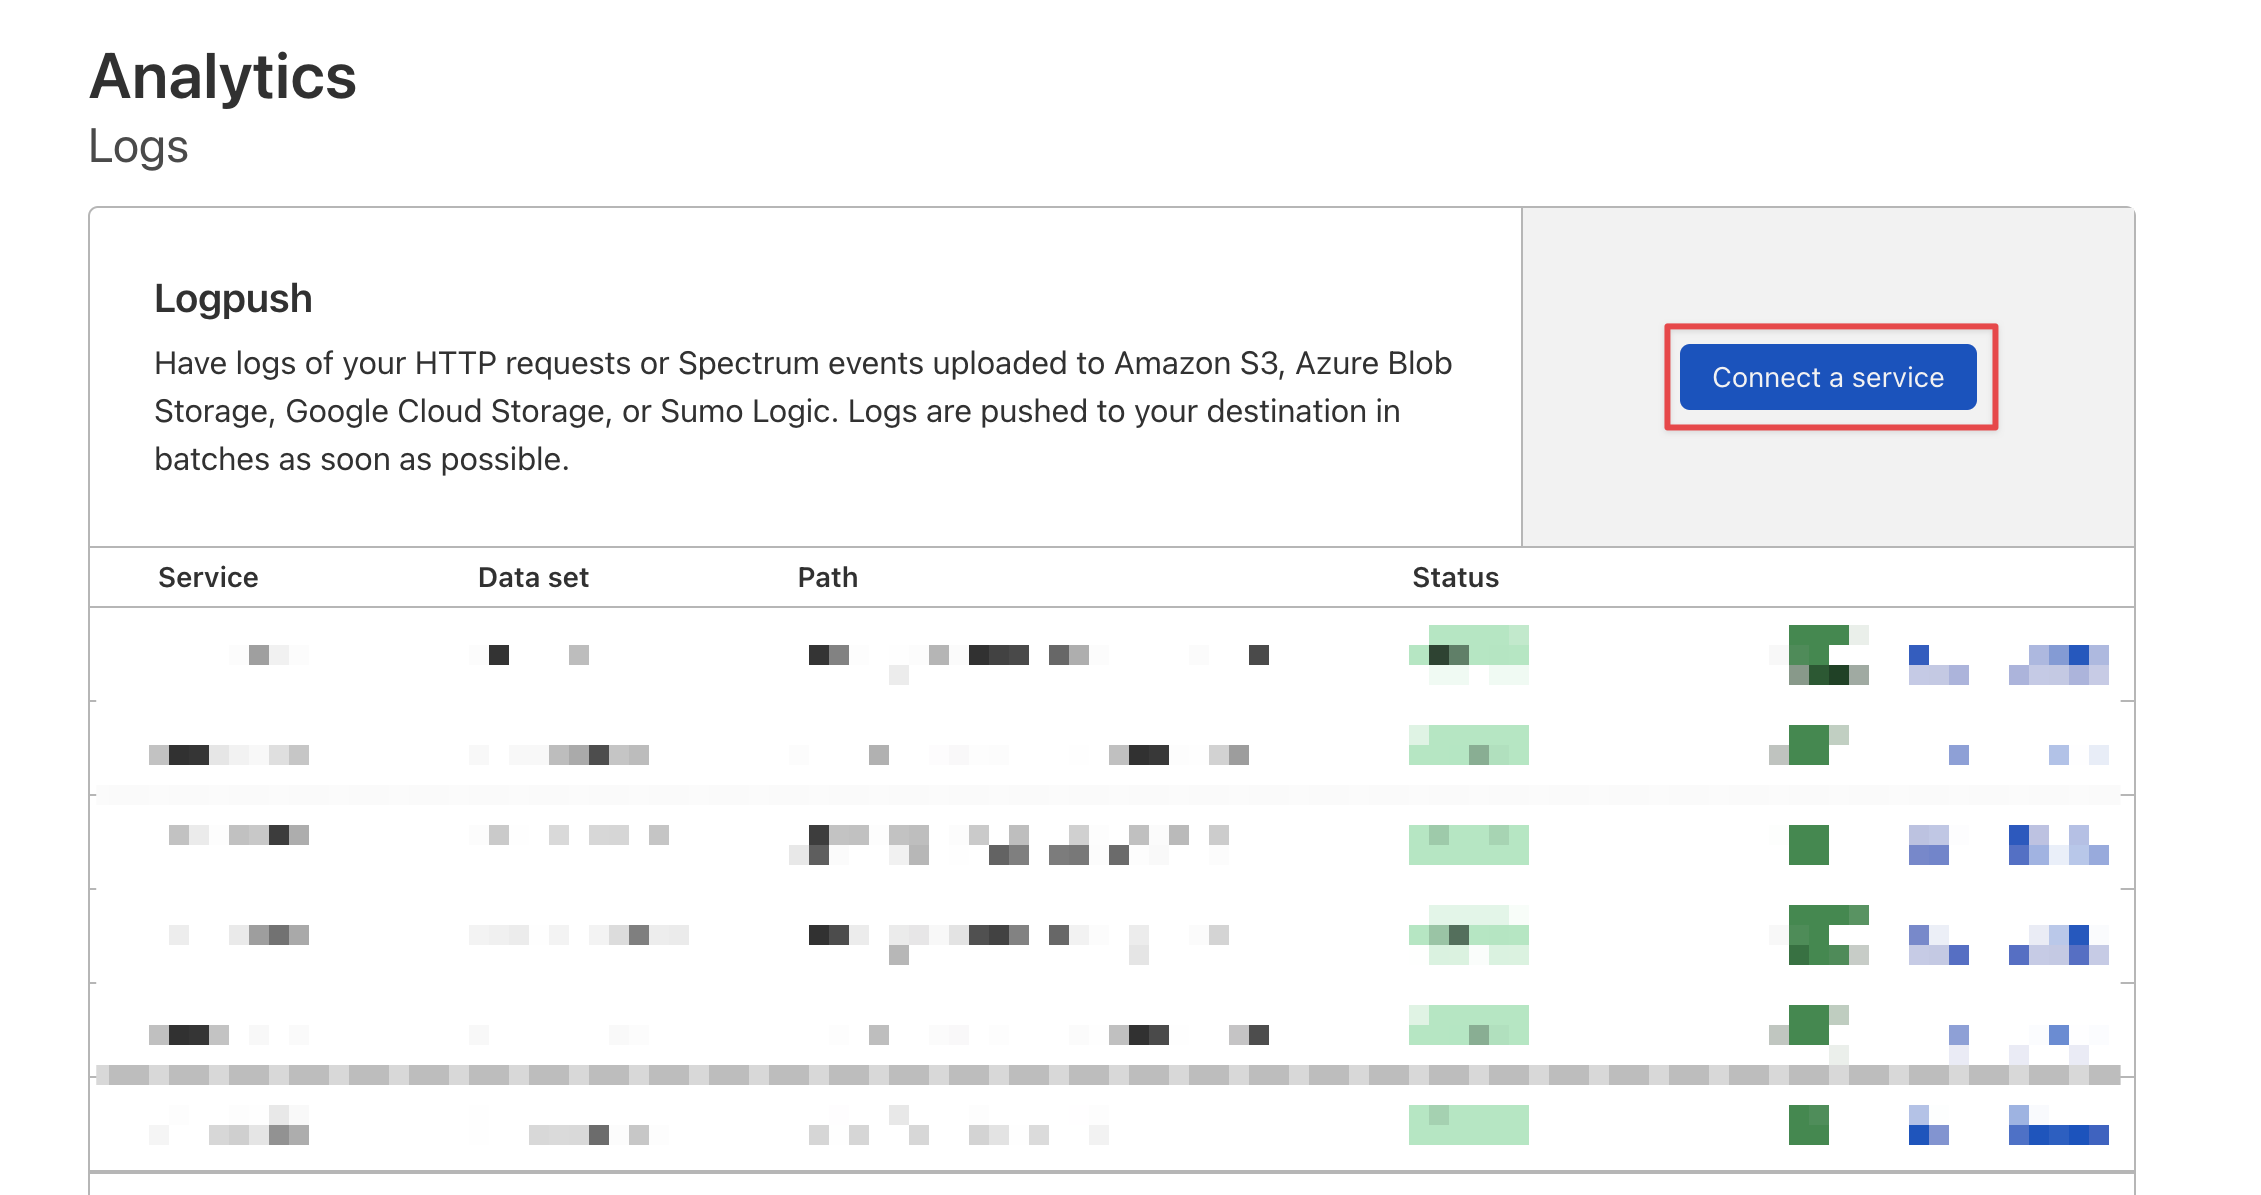
 2. In the **Logpush** section, click **Connect a service**.\\
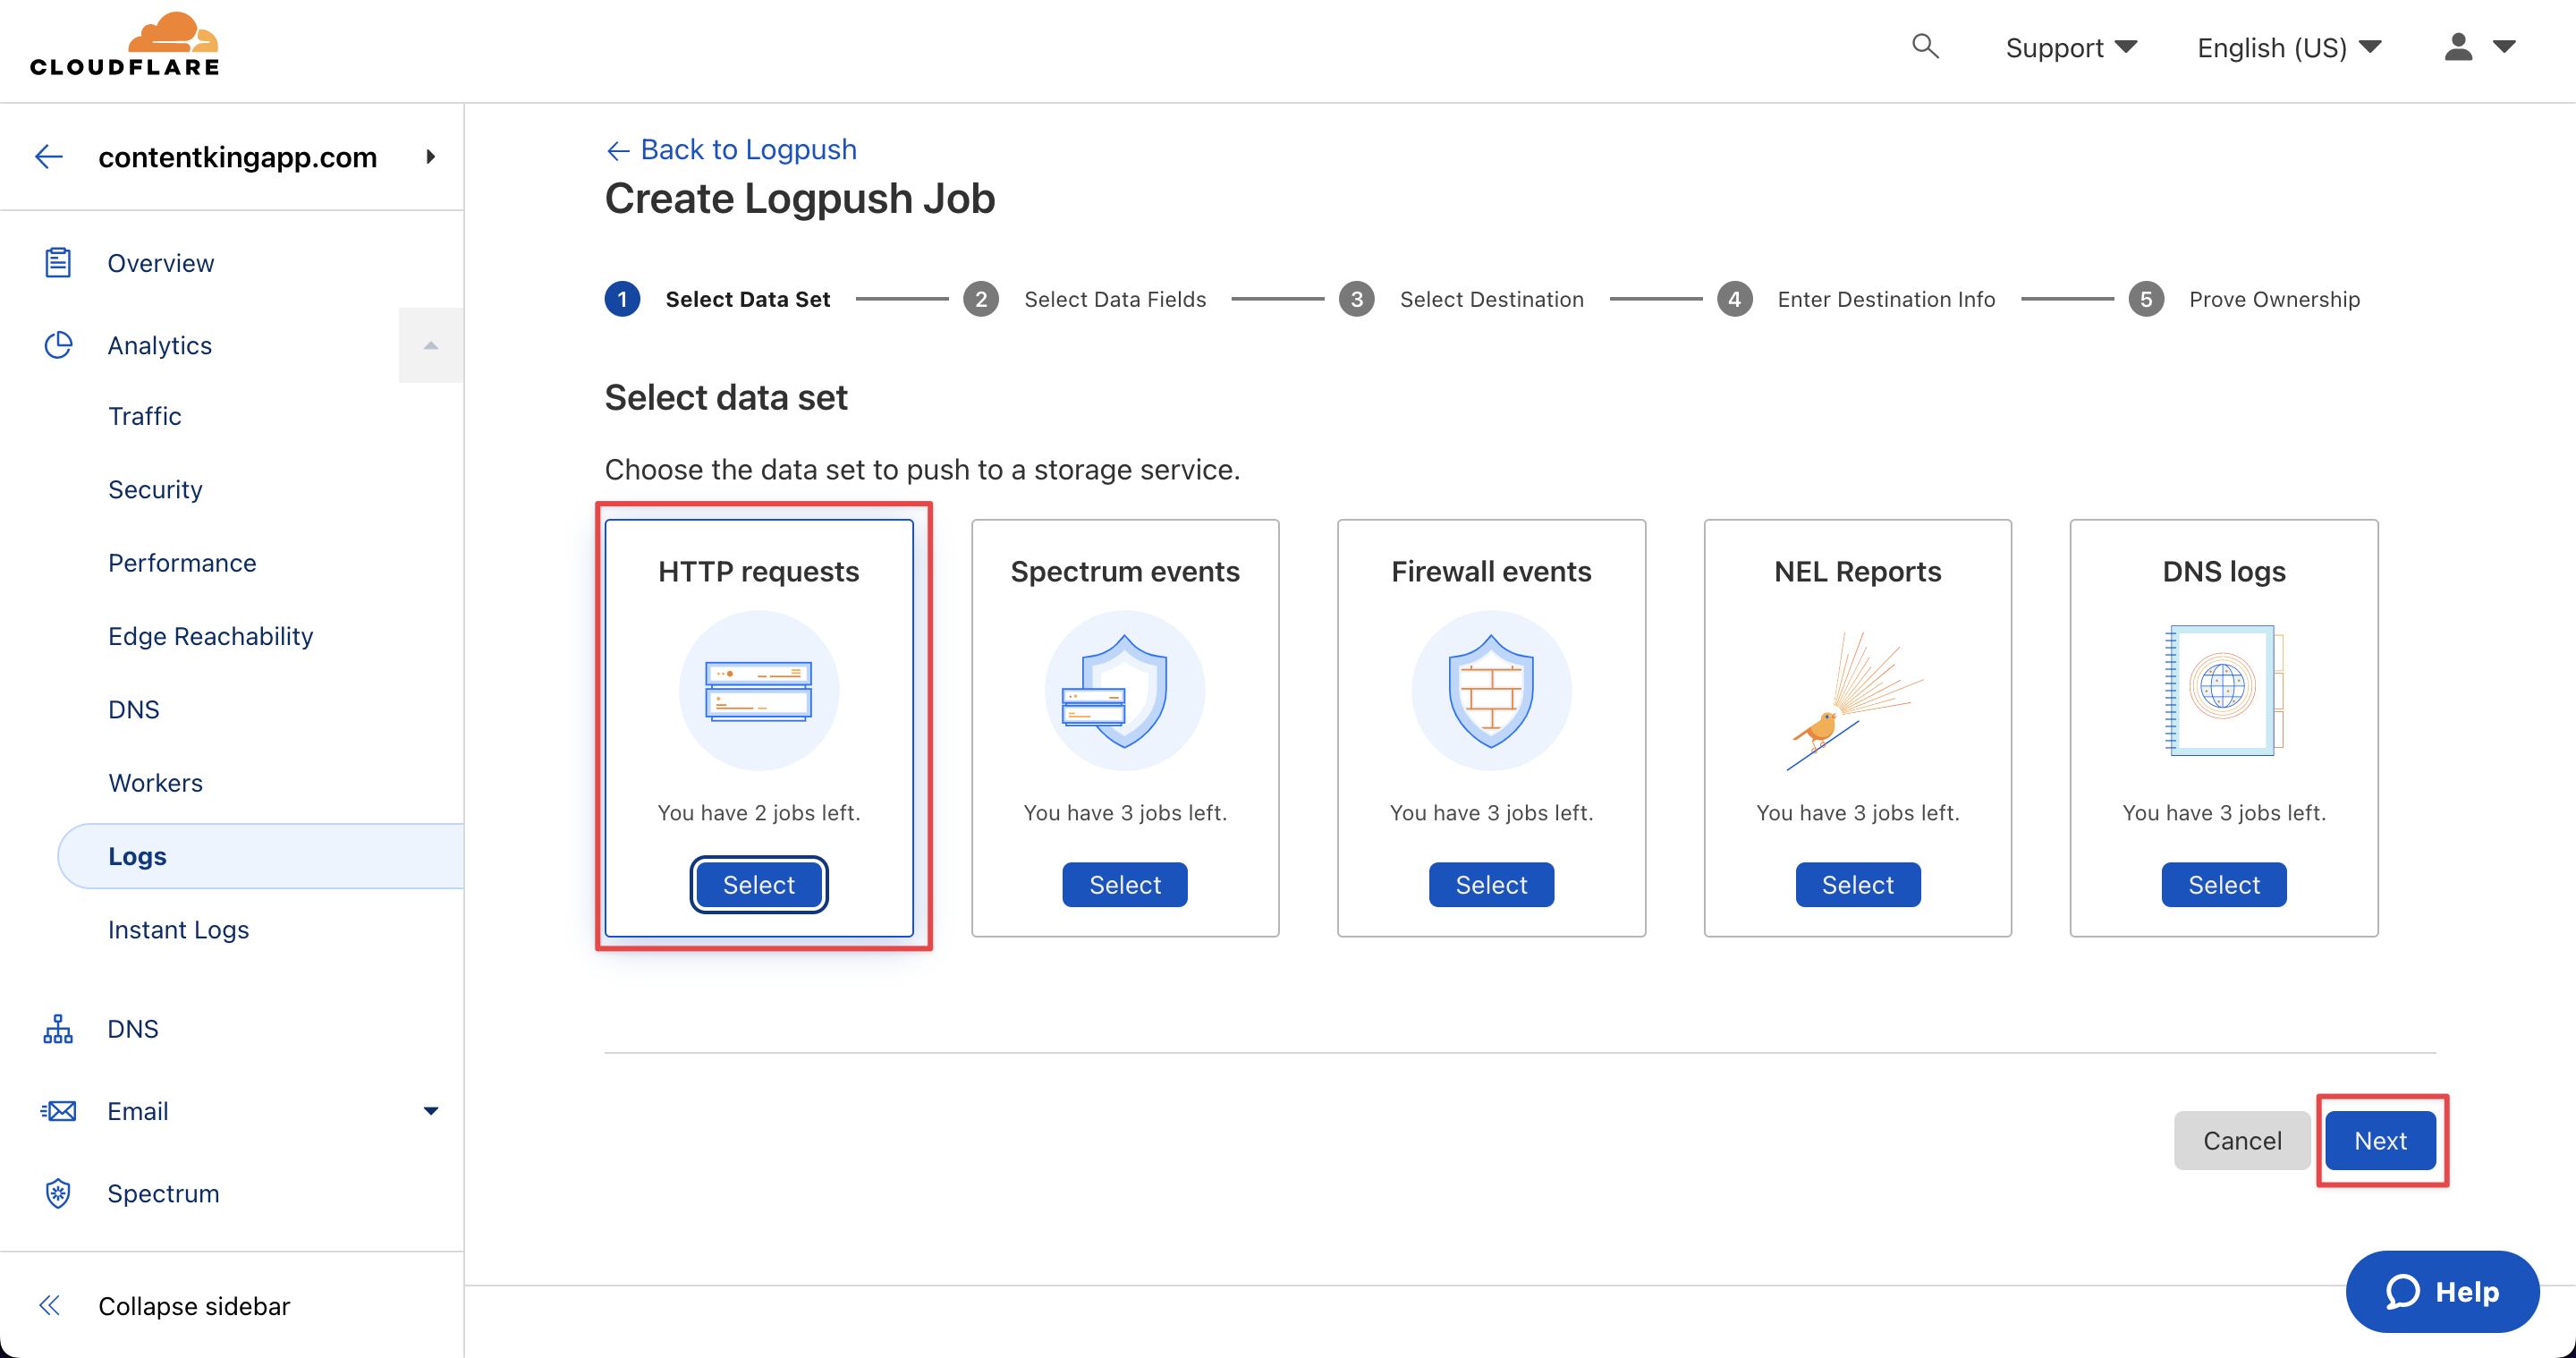
 3. In the **Select Data Set** step, select **HTTP requests** as the data set.\\
 4. Select the following Data Fields that need to be provided in the HTTP request log. All required Data Fields are preselected by default, apart from the following two that need to be specified manually:
* ClientRequestScheme (in the ClientRequest category)
* ClientRequestUserAgent (in the ClientRequest category)
* Client IP
* ClientRequestHost
* ClientRequestMethod
* ClientRequestURI
* EdgeEndTimestamp
5. After ensuring that the required Data Fields are selected, click **Next**.
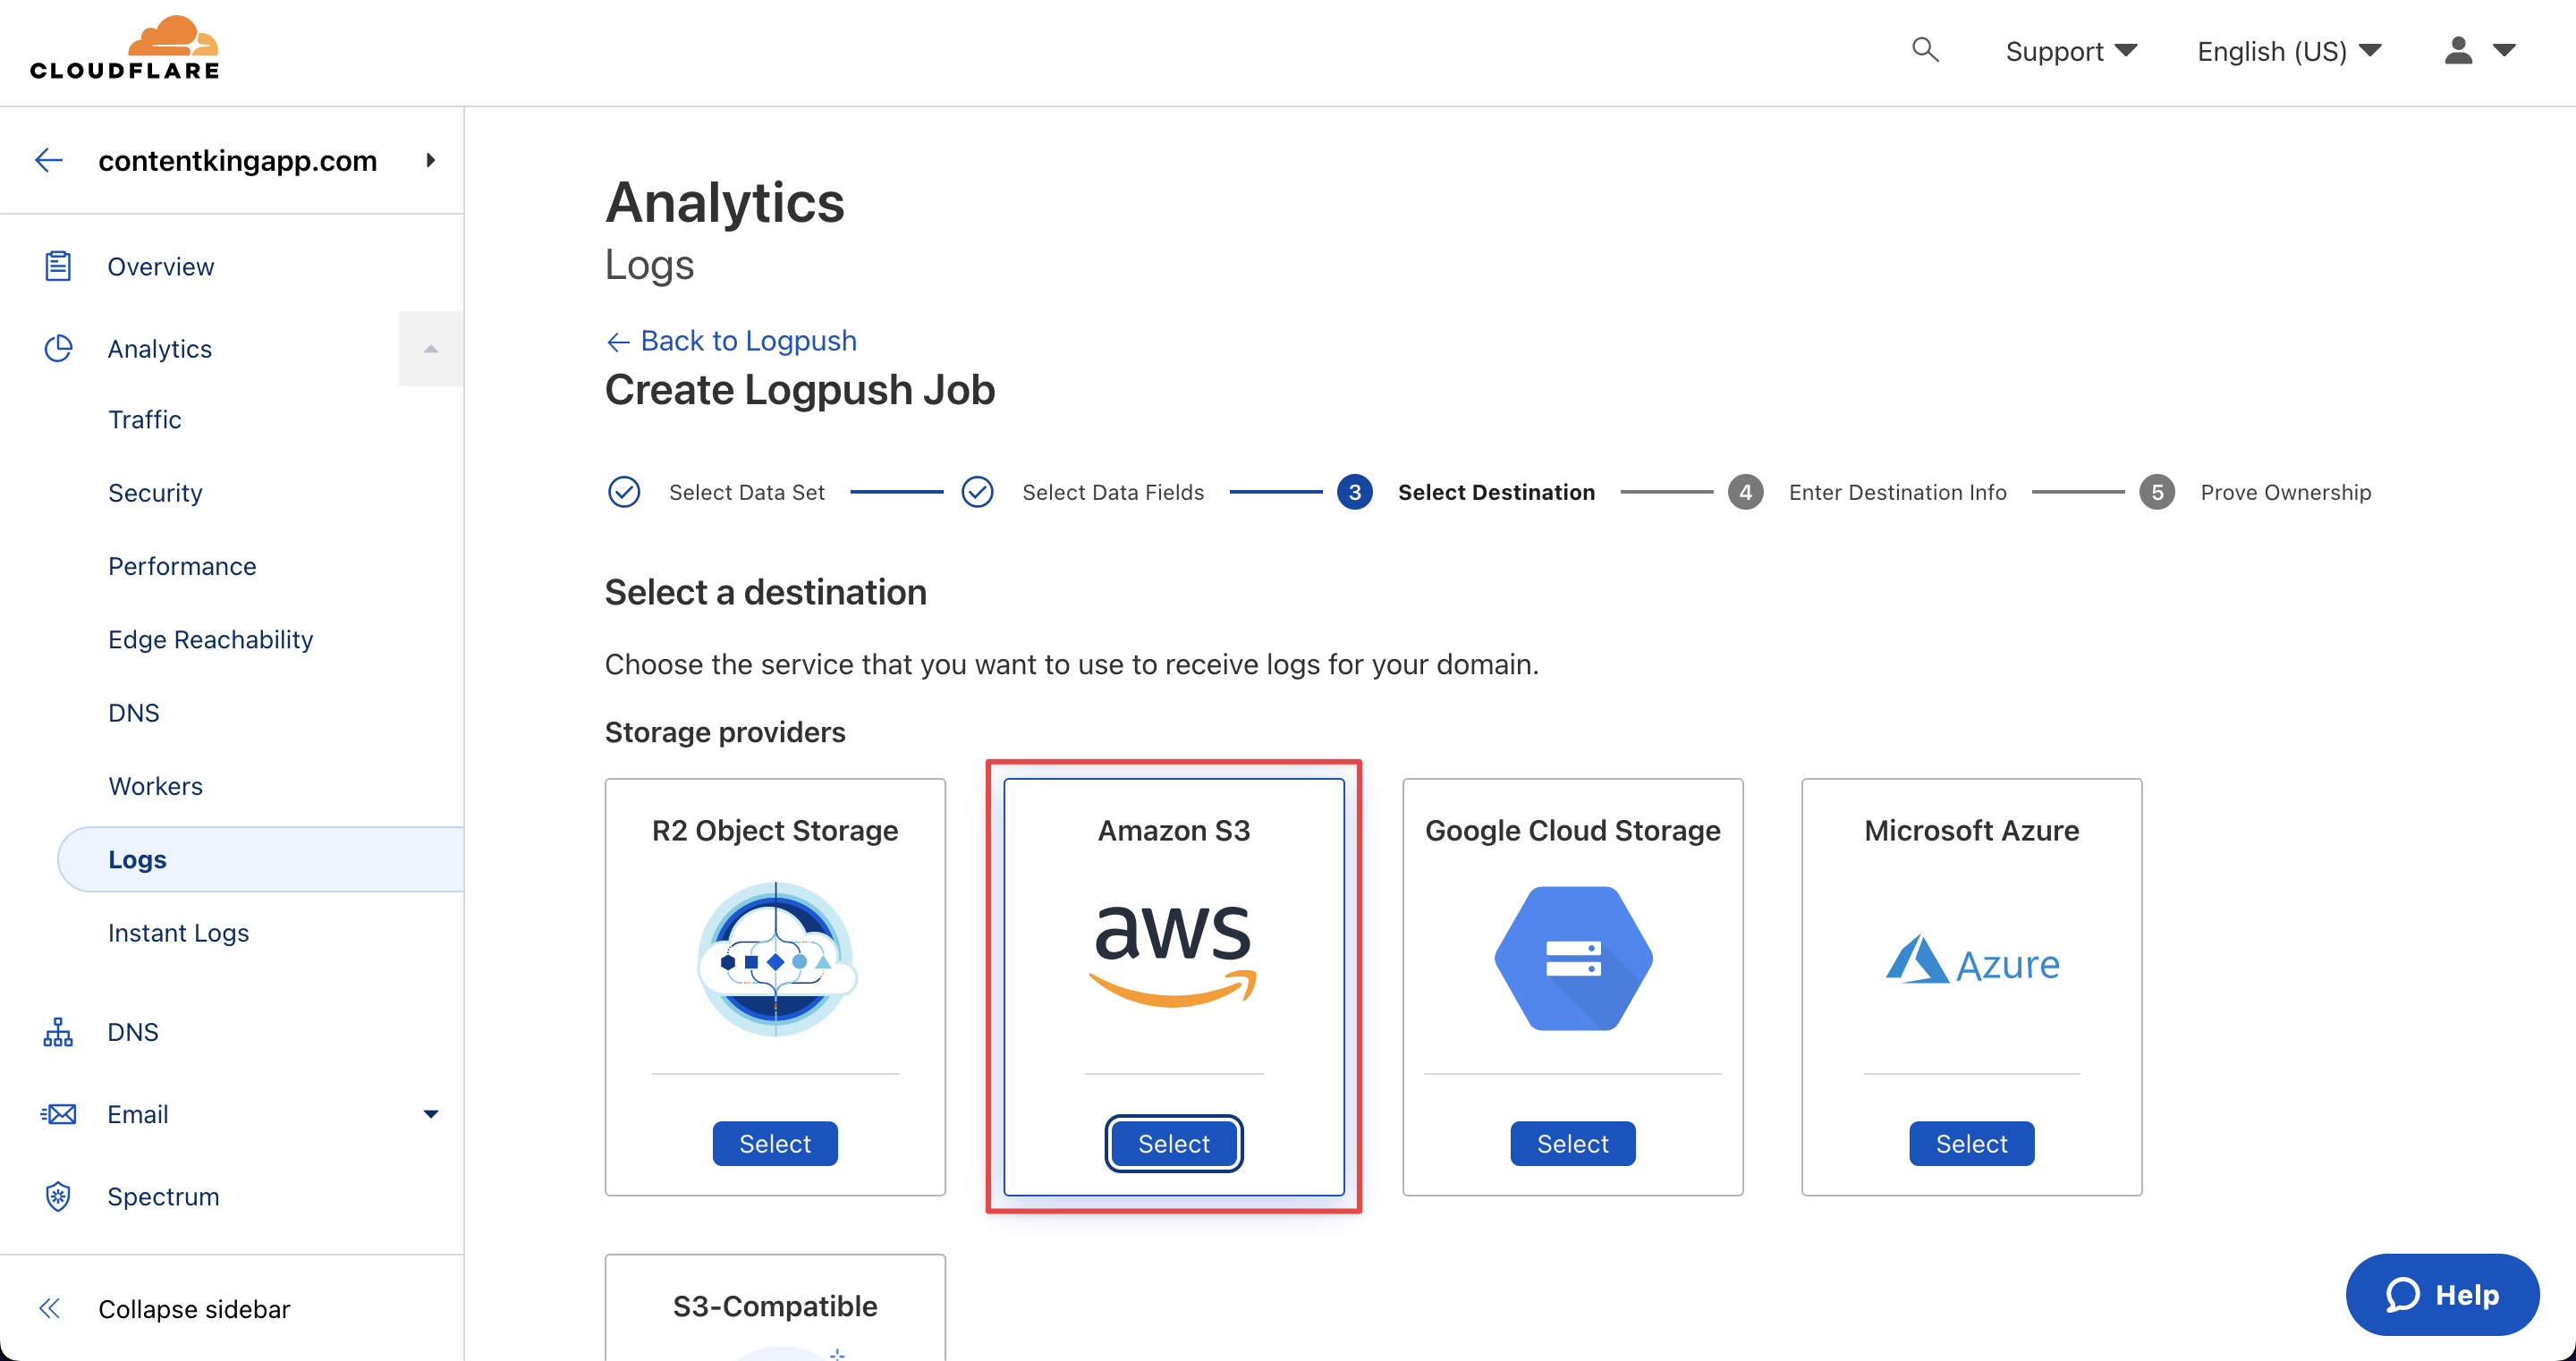
6. Select Amazon S3 as the destination and click **Next**.\\
4. Select the following Data Fields that need to be provided in the HTTP request log. All required Data Fields are preselected by default, apart from the following two that need to be specified manually:
* ClientRequestScheme (in the ClientRequest category)
* ClientRequestUserAgent (in the ClientRequest category)
* Client IP
* ClientRequestHost
* ClientRequestMethod
* ClientRequestURI
* EdgeEndTimestamp
5. After ensuring that the required Data Fields are selected, click **Next**.
6. Select Amazon S3 as the destination and click **Next**.\\
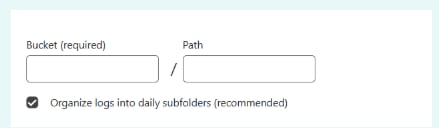
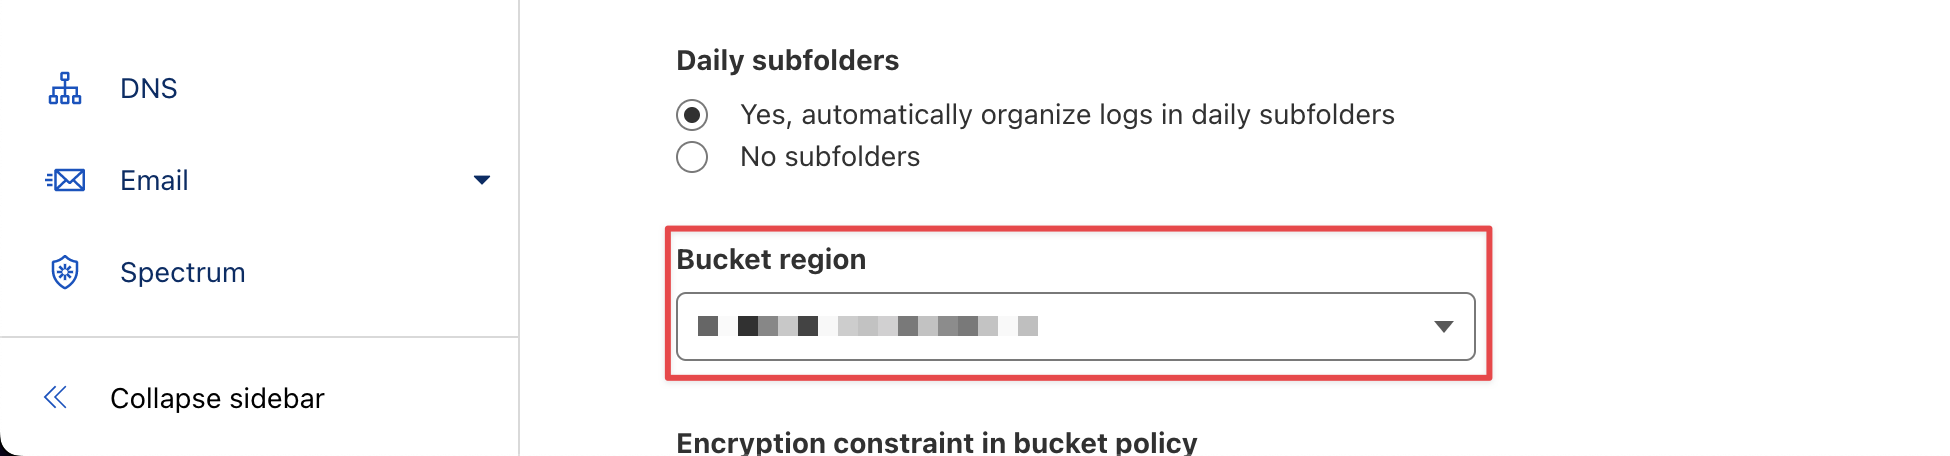
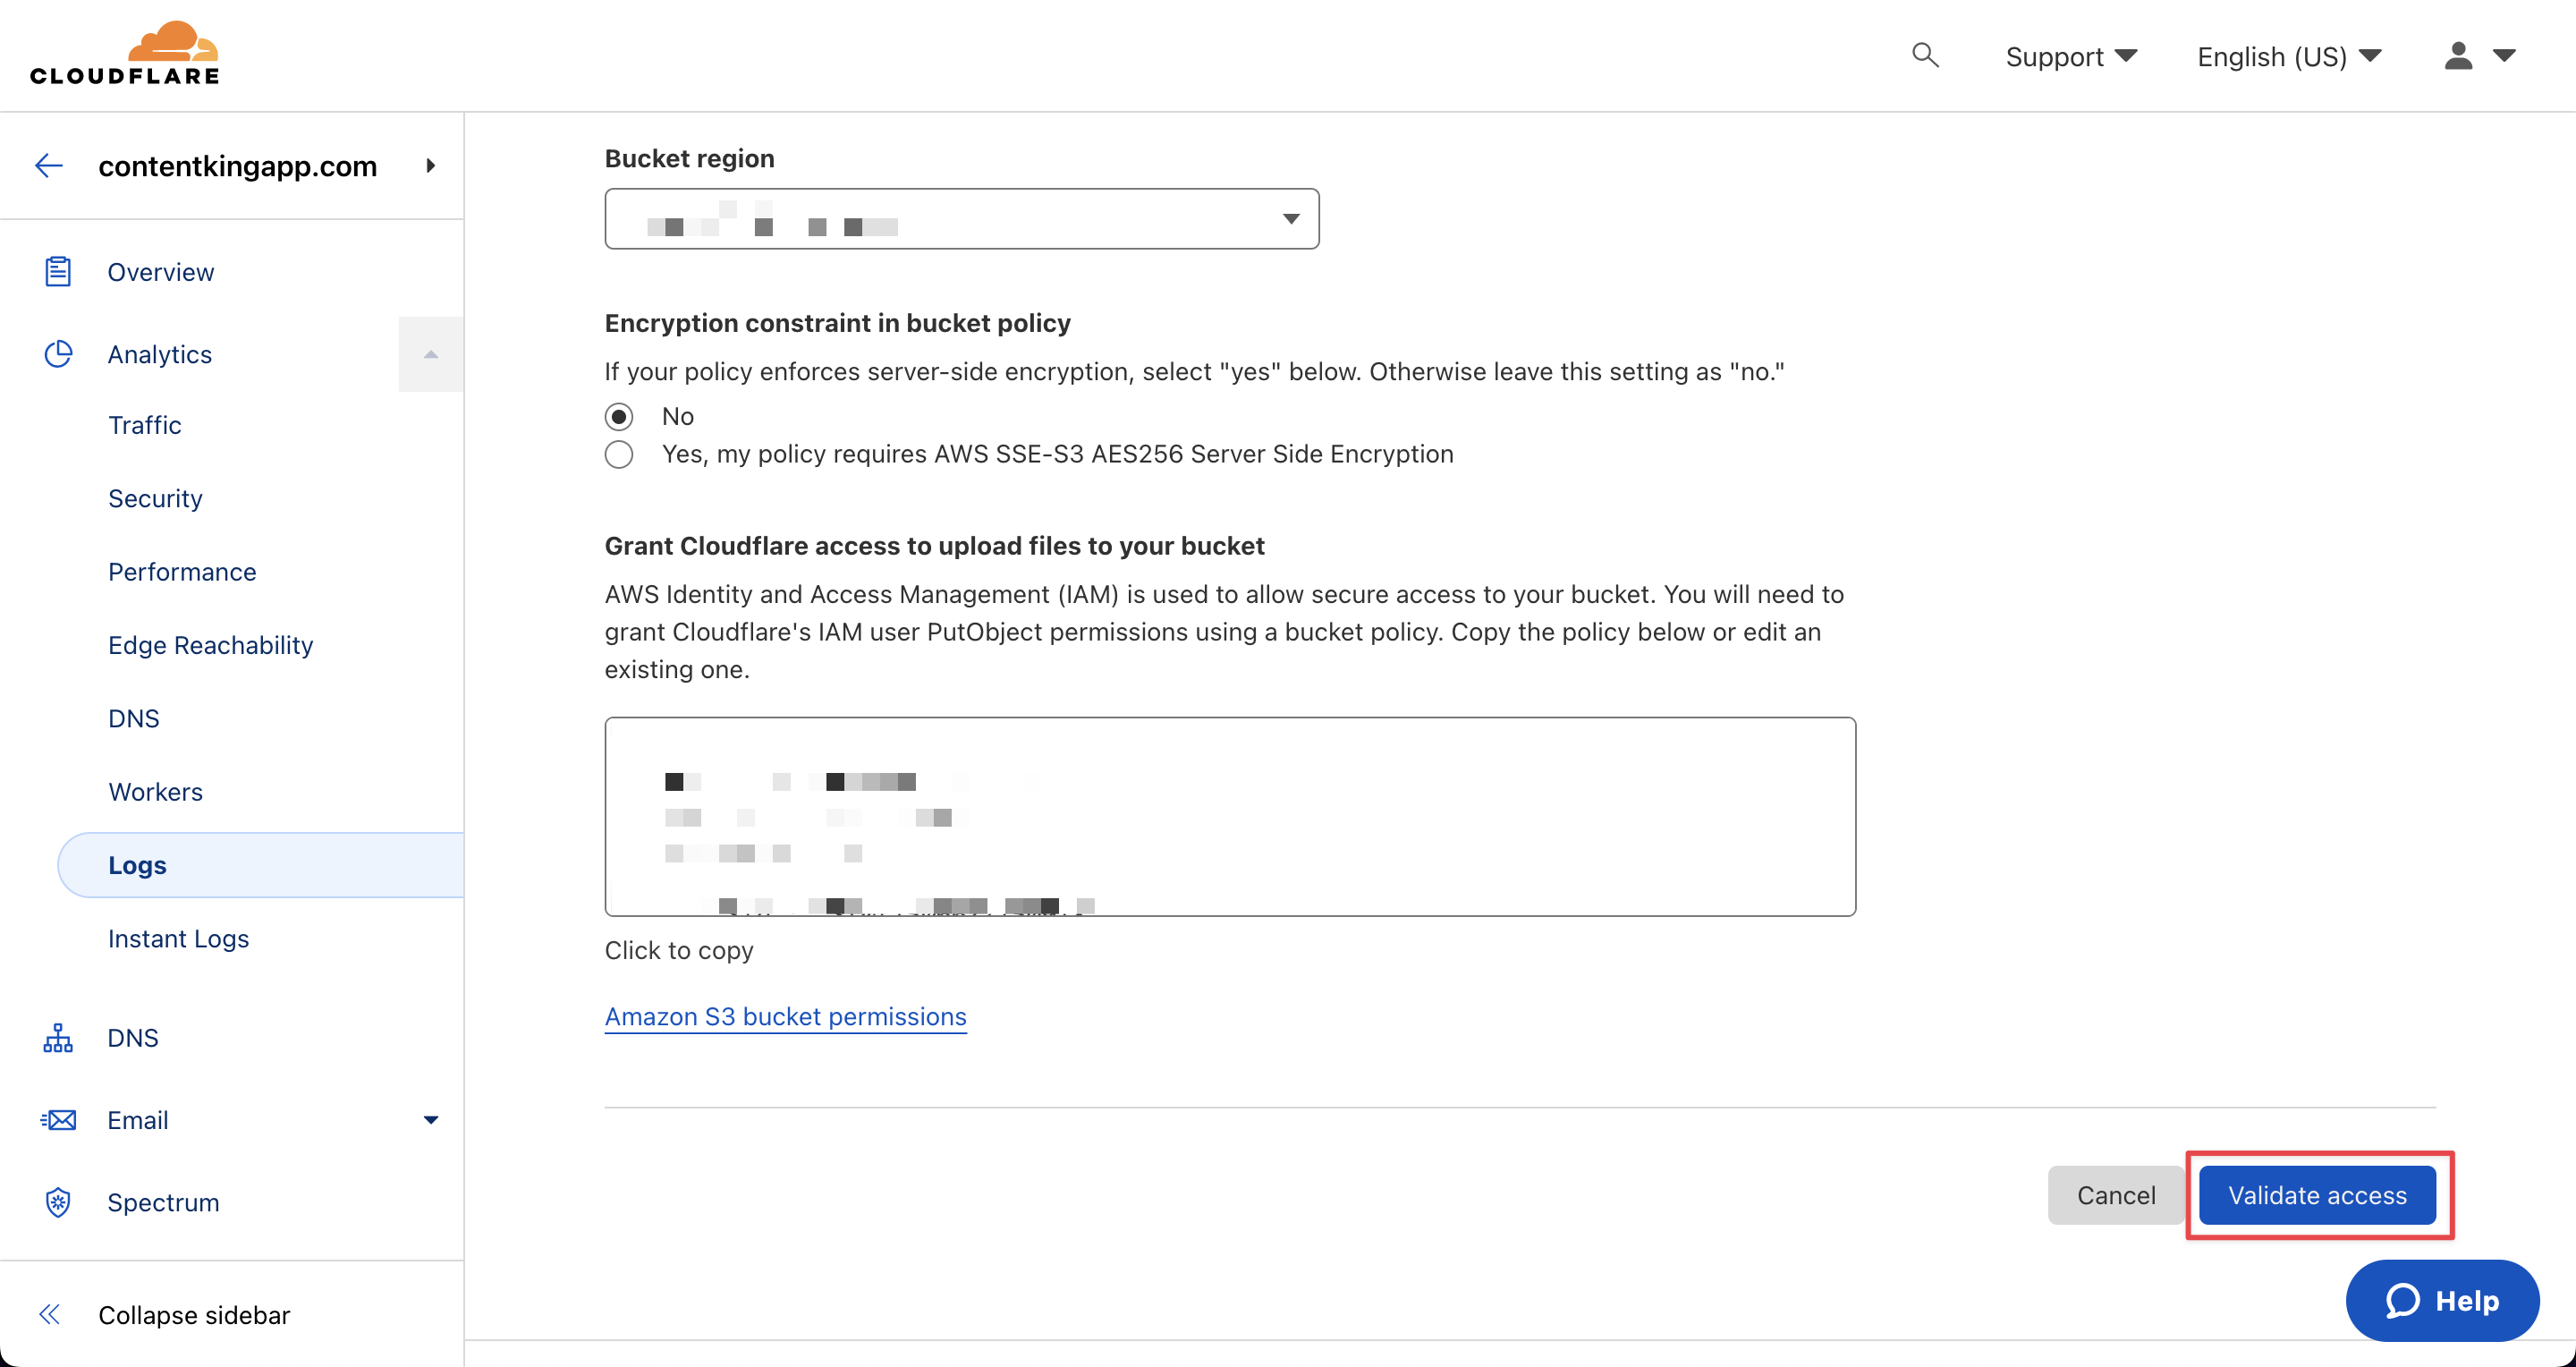
 7. Enter the **Bucket** and **Path** and the **Bucket region** generated in Conductor Monitoring to the corresponding fields in the **Enter destination information** step. The default selection should be kept for all other options:\\
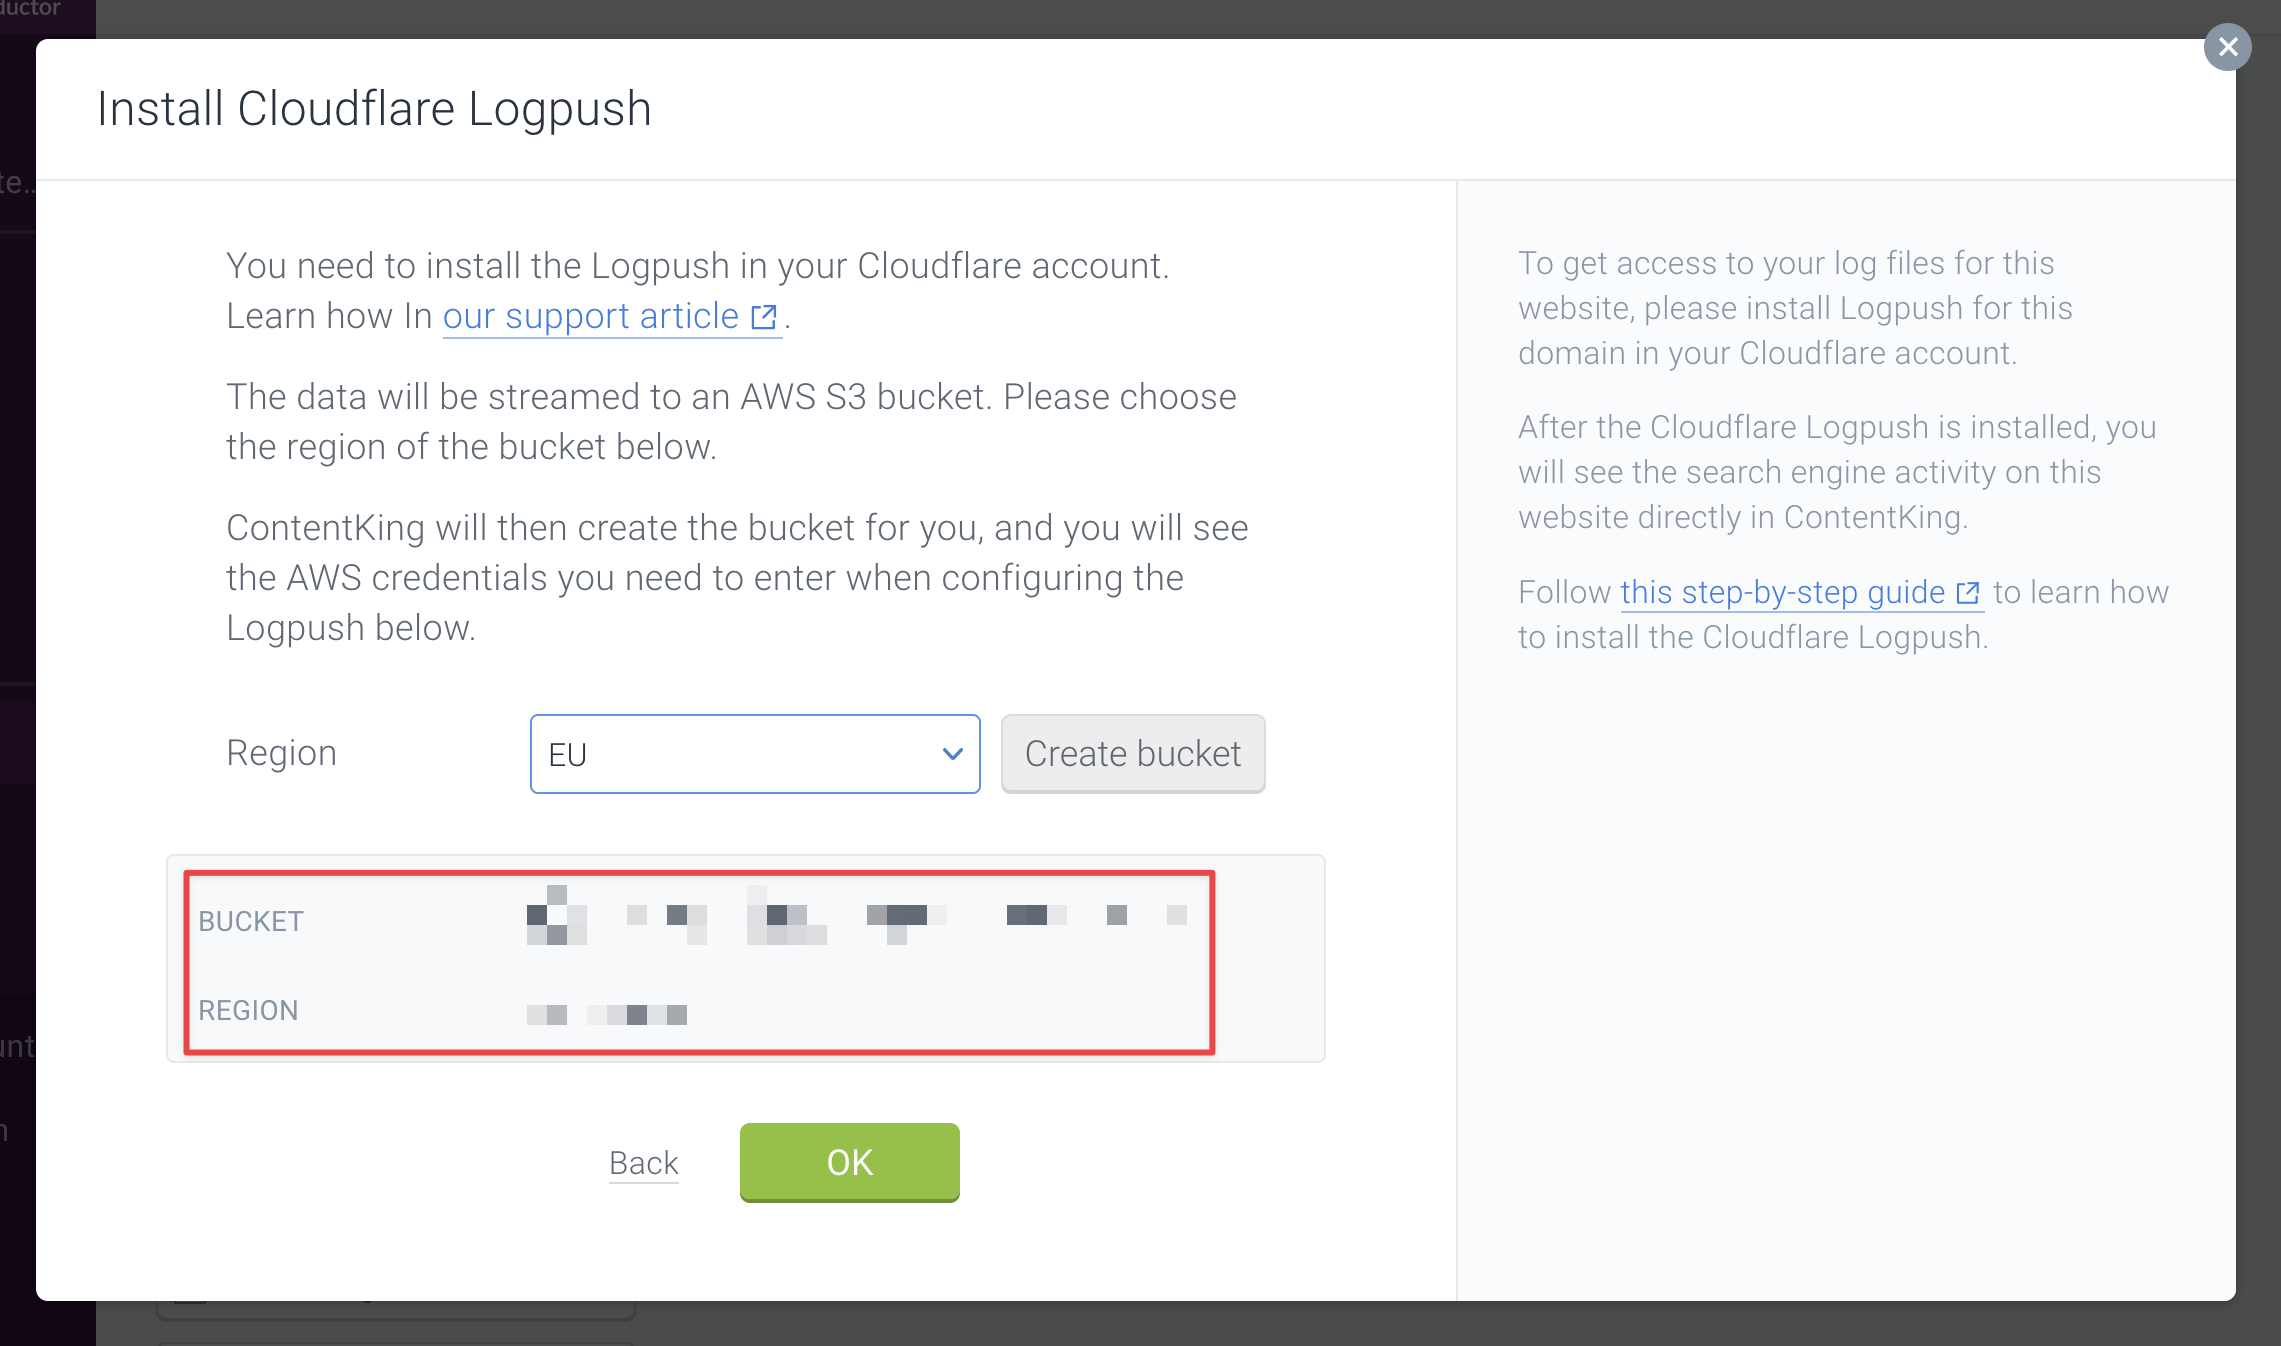 1. Enter the entire Conductor Monitoring "Bucket" value in the **Bucket** field in Cloudflare. Leave the **Path** field blank.\\
 2. Enter the "Region" value from Conductor Monitoring in the **Bucket region** field in Cloudflare.\\
 8. Once done, click **Validate access**.\\
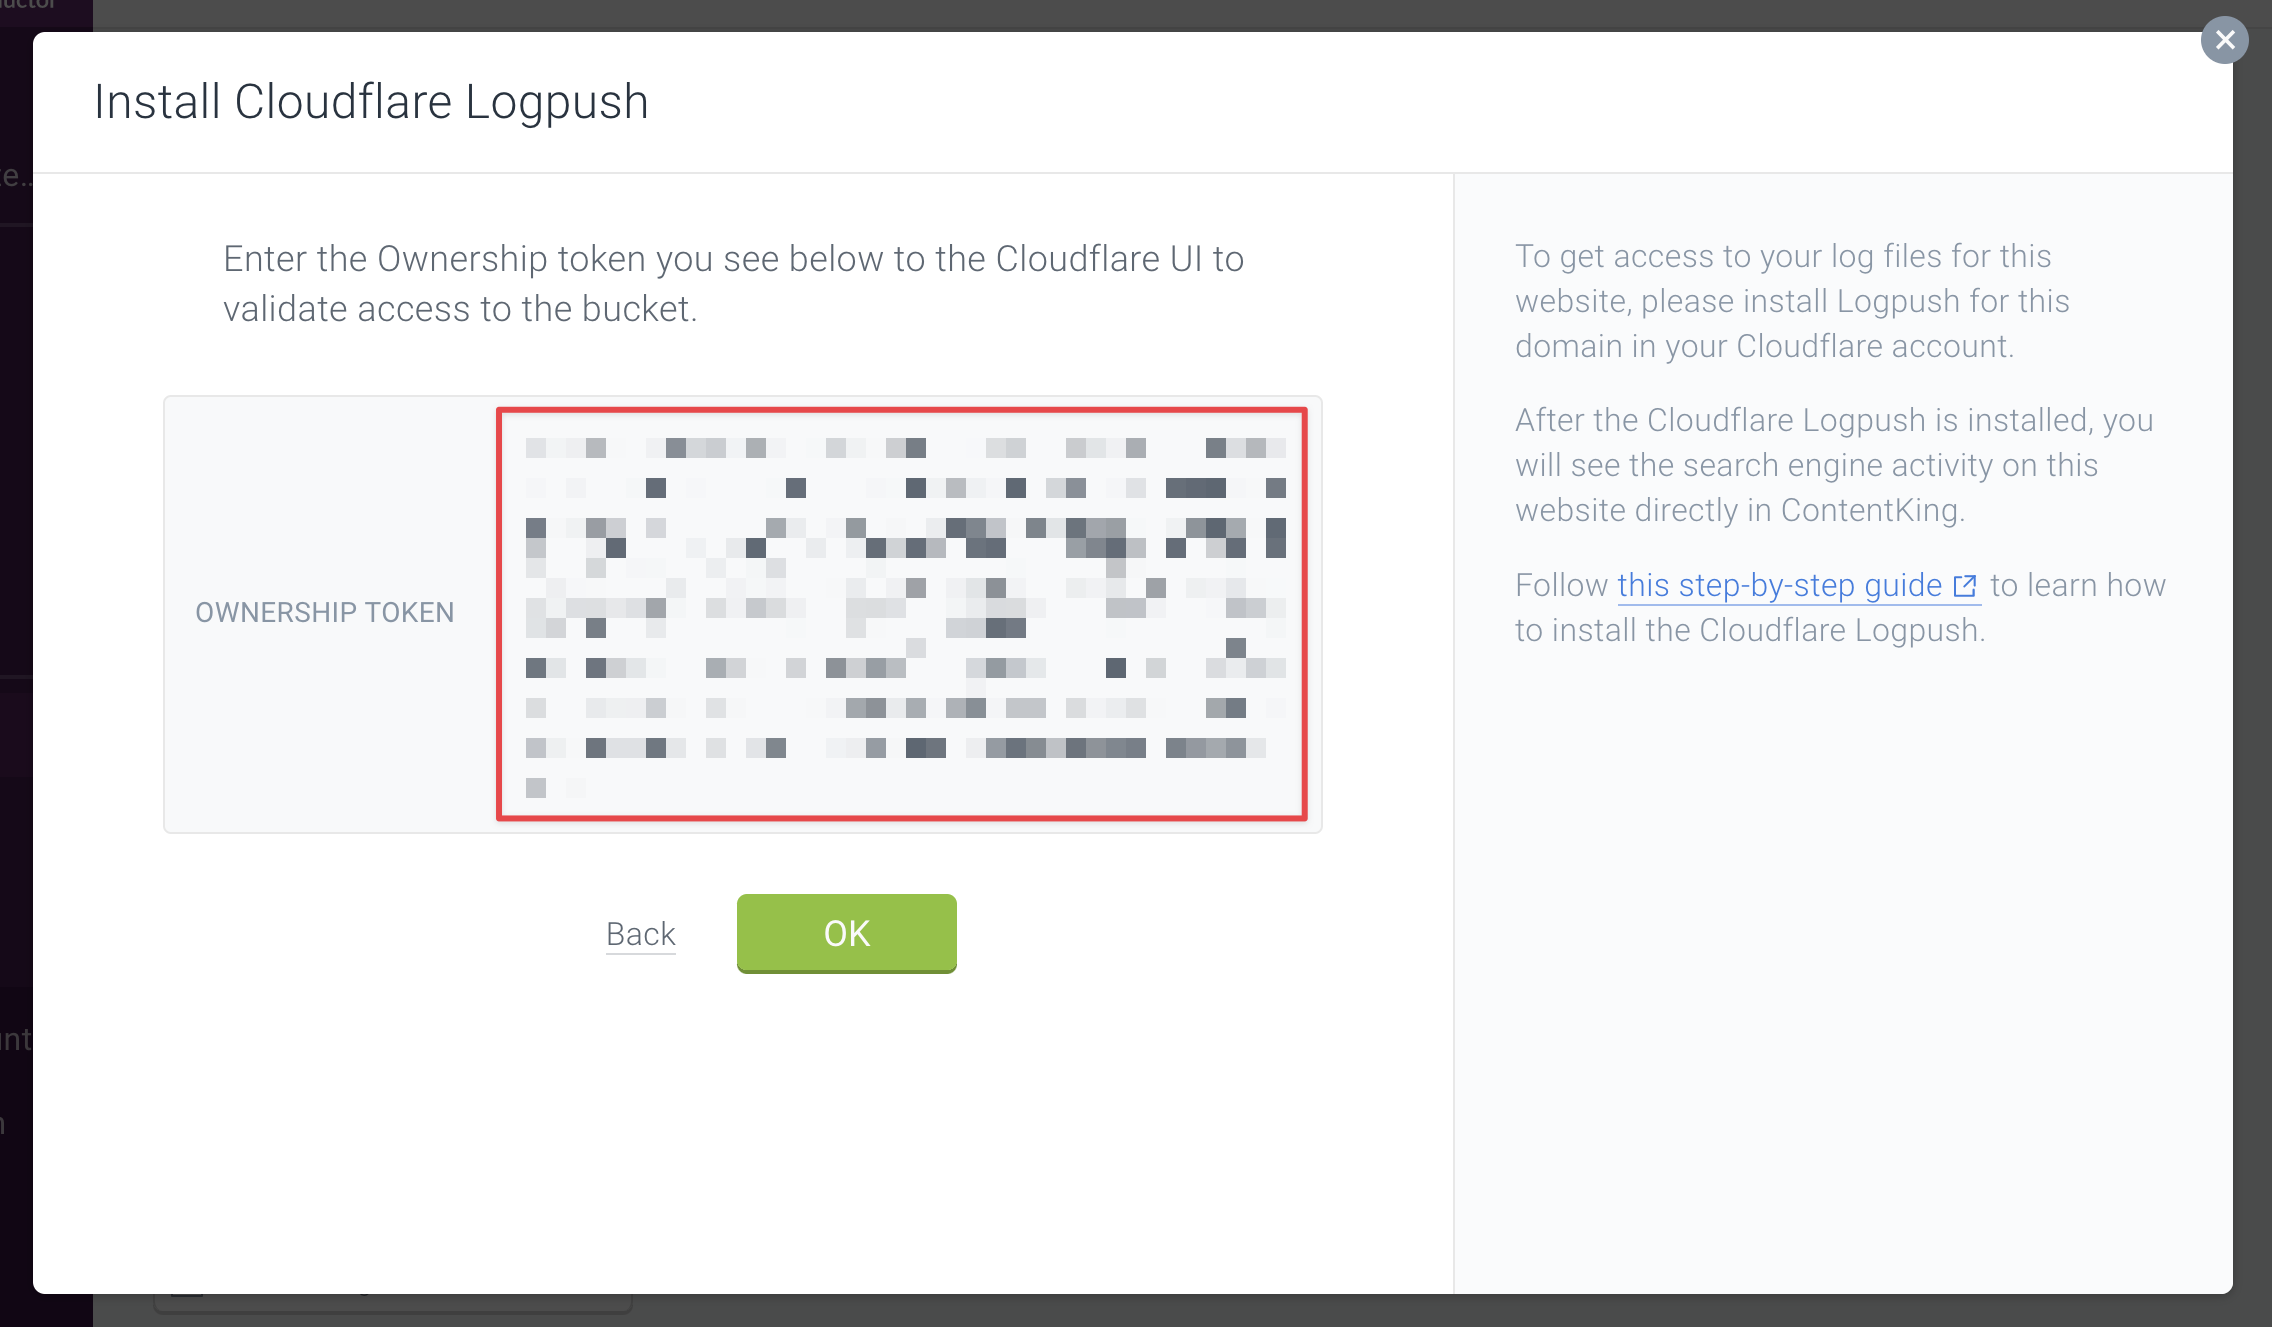
 9. After initiating access validation, Cloudflare sends a file to Conductor Monitoring's specified S3 bucket that contains the **Ownership token**. Validate access to the S3 bucket by copy-pasting the Ownership token from Conductor Monitoring to Cloudflare:
1. Navigate back to Conductor Monitoring, click **Next** if you haven't already, and copy the Ownership token to your clipboard:\\
9. After initiating access validation, Cloudflare sends a file to Conductor Monitoring's specified S3 bucket that contains the **Ownership token**. Validate access to the S3 bucket by copy-pasting the Ownership token from Conductor Monitoring to Cloudflare:
1. Navigate back to Conductor Monitoring, click **Next** if you haven't already, and copy the Ownership token to your clipboard:\\
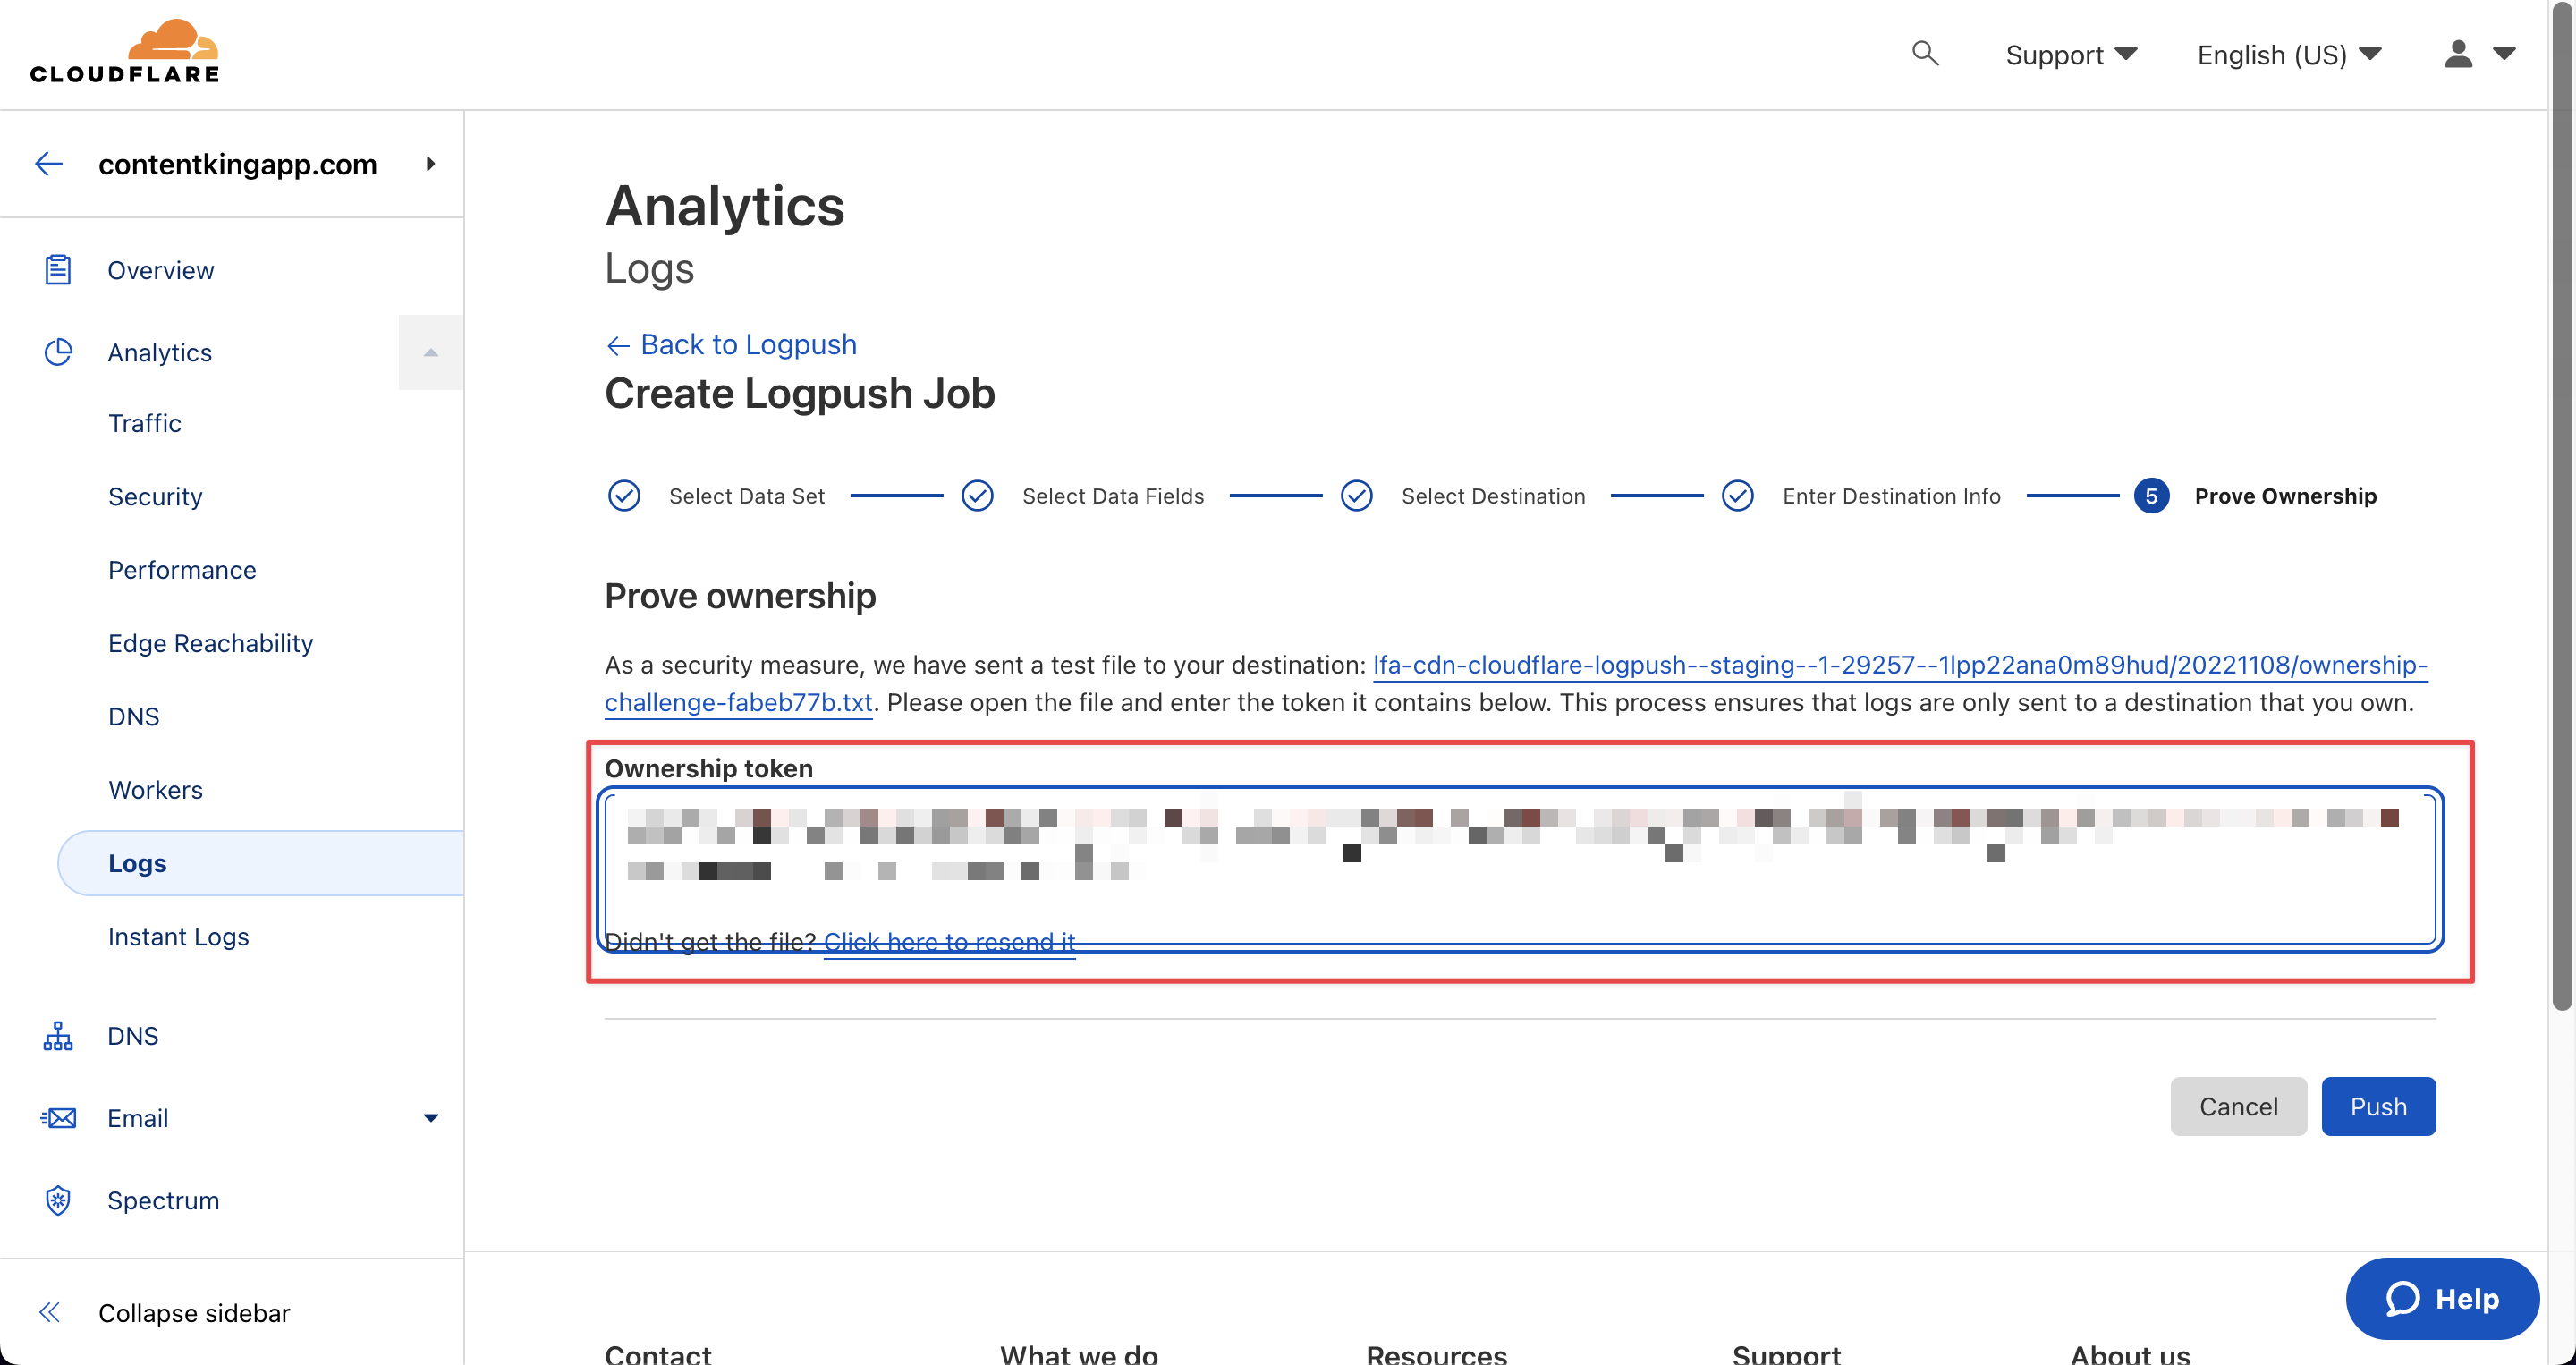
 2. Navigate back to the Cloudflare UI and paste the Ownership token to the corresponding field:\\
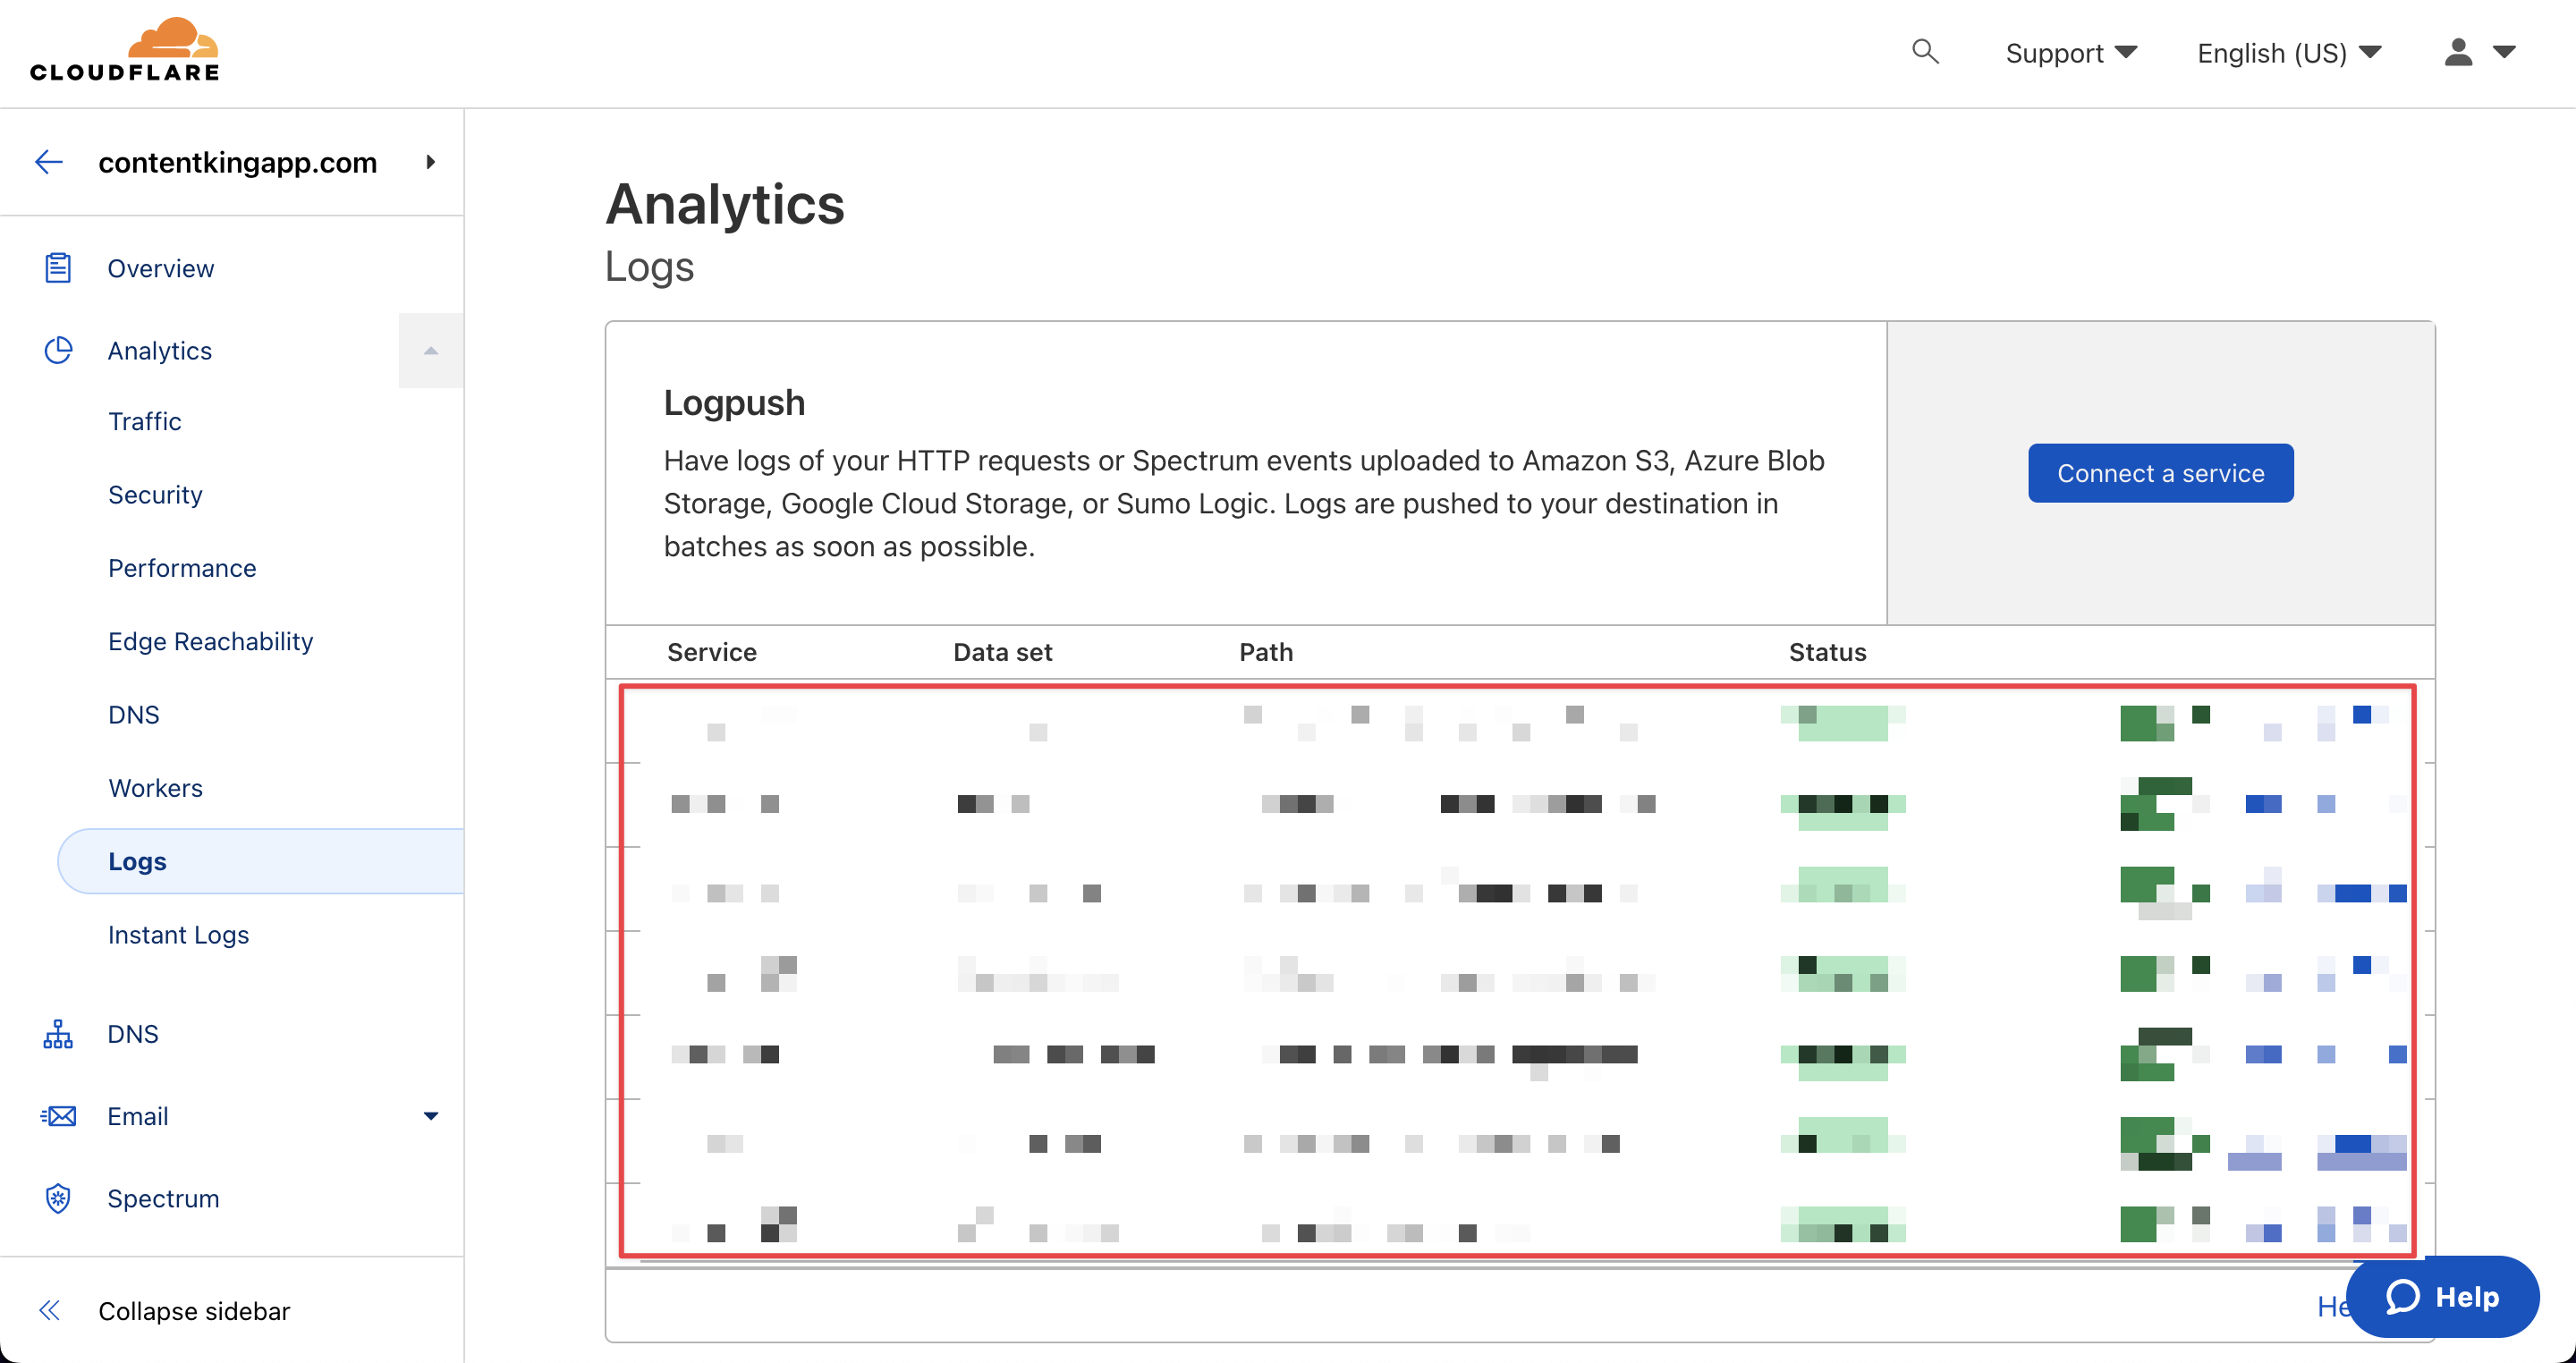
 3. Click **Push**. After that, you should see the Logpush service that you have just created in the overview.\\
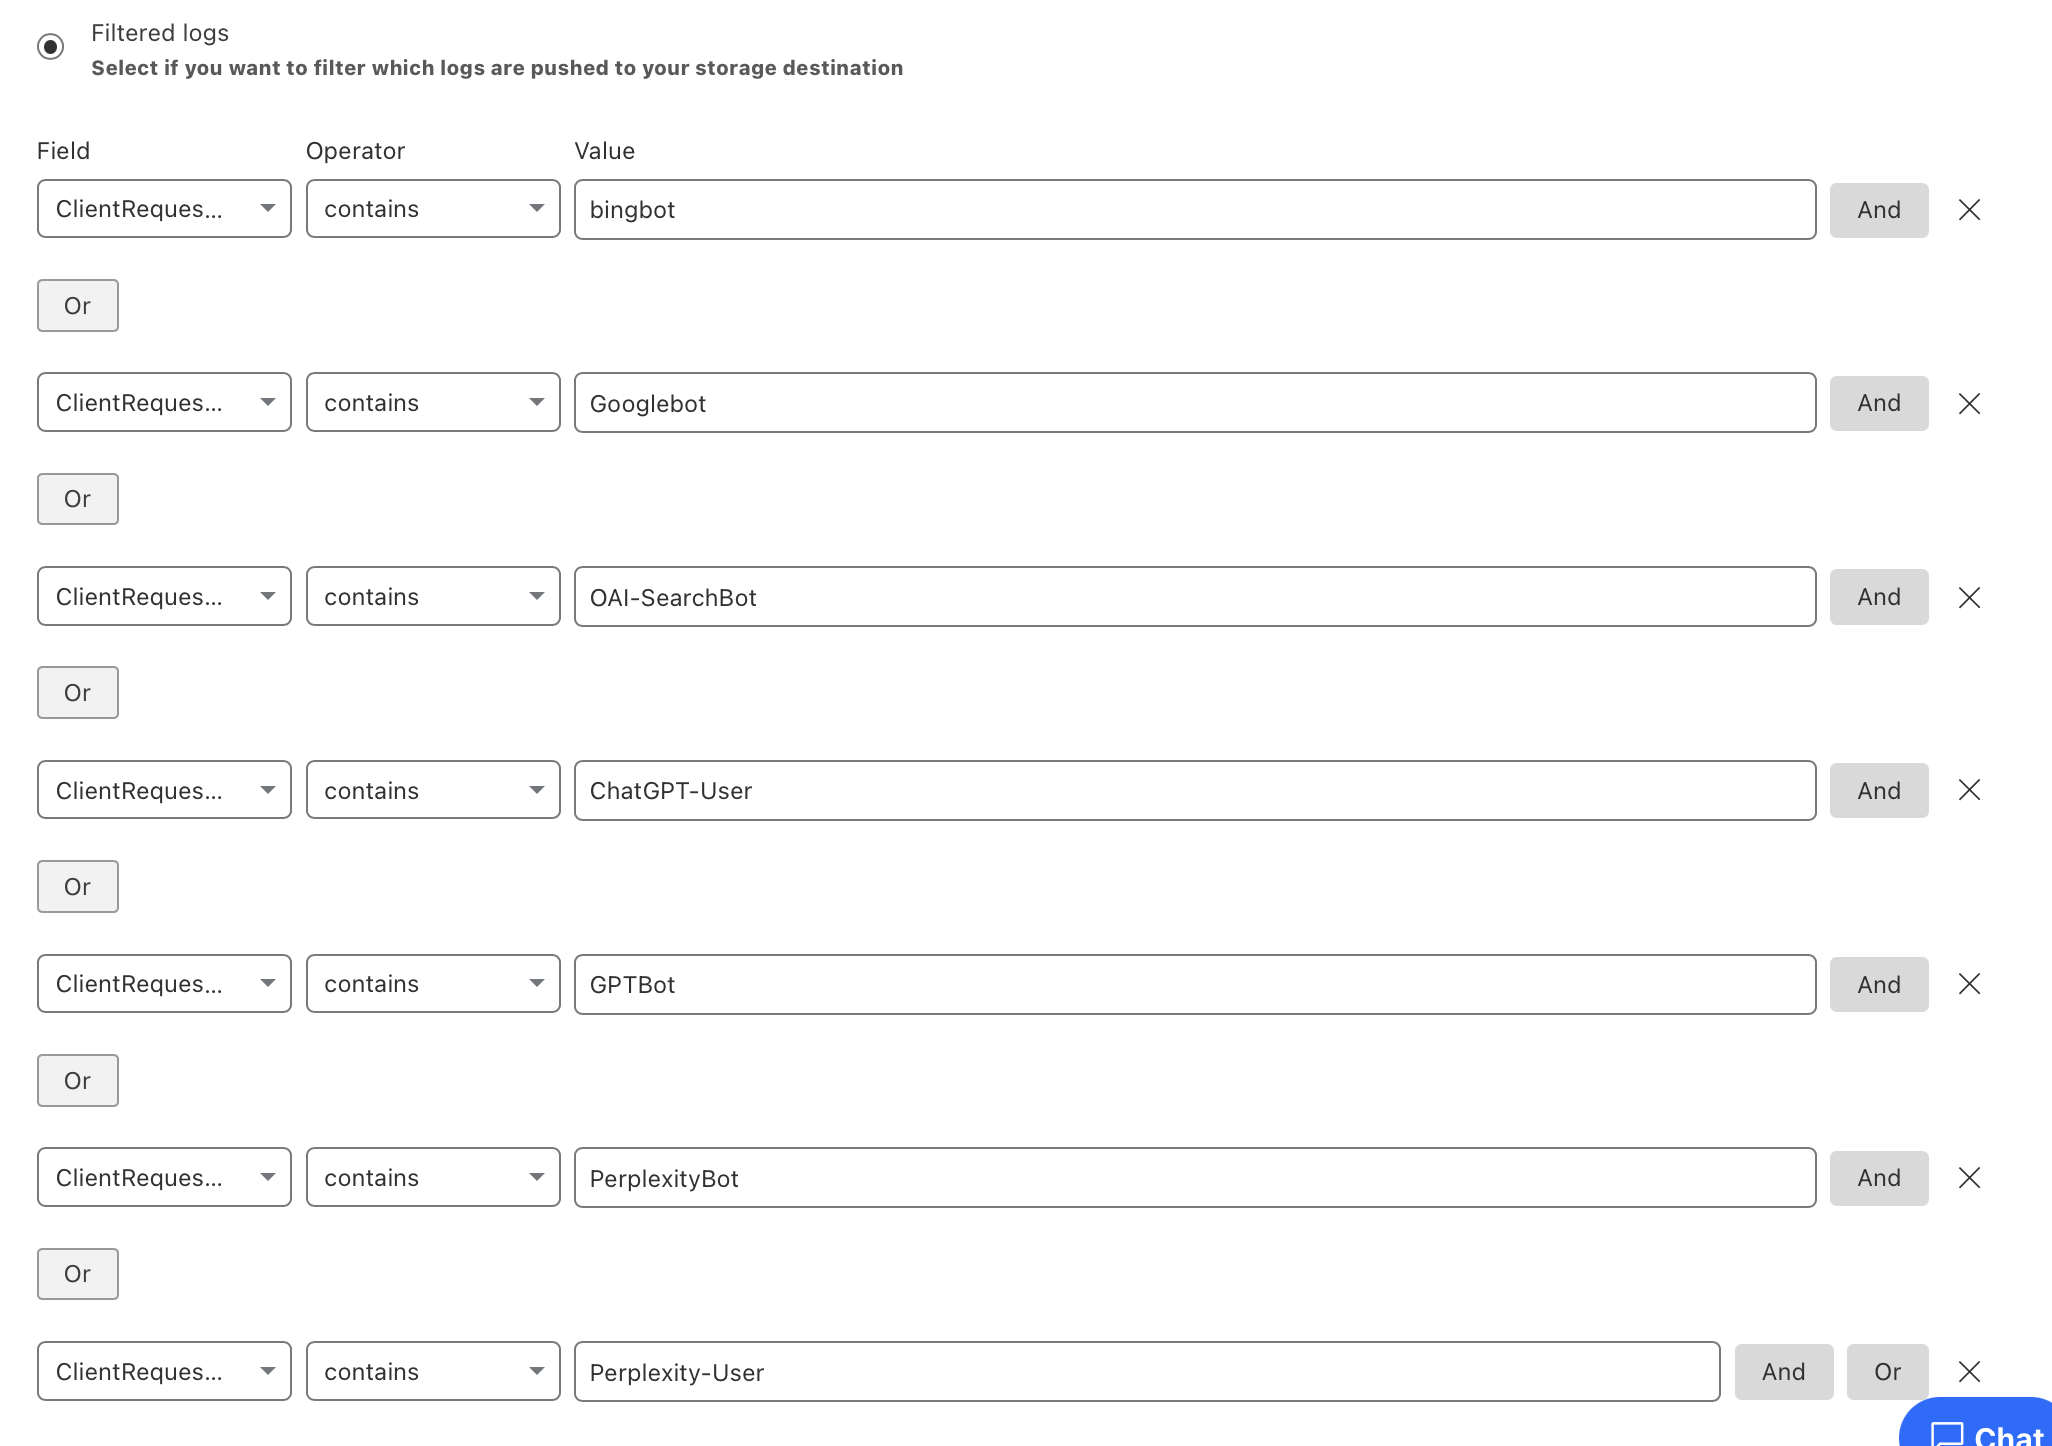
 ### Filter away non-search engine traffic
To ensure you capture visits from all of the bots for which Conductor supports detection, you might need to create filters for your log files. Be sure you allow all of the following user agents:
* bingbot
* Googlebot
* OAI-SearchBot
* ChatGPT-User
* GPTBot
* PerplexityBot
* Perplexity-User
Note that these strings are case sensitive, so be sure you are using the correct lower- and upper-case letters as shown above.
### Filter away non-search engine traffic
To ensure you capture visits from all of the bots for which Conductor supports detection, you might need to create filters for your log files. Be sure you allow all of the following user agents:
* bingbot
* Googlebot
* OAI-SearchBot
* ChatGPT-User
* GPTBot
* PerplexityBot
* Perplexity-User
Note that these strings are case sensitive, so be sure you are using the correct lower- and upper-case letters as shown above.
 ### Reinstalling Cloudflare Logpush
If you want to change the AWS S3 bucket region or reinstall Cloudflare Logpush, you can do it in the following way:
1. Click on the website on which you want to reinstall Cloudflare Logpush in the [Websites section](https://app.contentkingapp.com/account/websites?view=list) of Conductor Monitoring.
2. Click **Log File Analysis** in **Settings**, and then the **reinstall** link next to the **Cloudflare Logpush** delivery method in the **Log Sources**.
3. If needed change the region, and click on **Create bucket**.
4. Configure Cloudflare Logpush following [the steps above](#2-configuring-cloudflare-logpush).
## Disabling Log File Analysis
Same as with enabling Log File Analysis, you need to disable the feature in Conductor Monitoring and then remove the Cloudflare Logpush service in the Cloudflare UI.
### Disabling Log File Analysis
1. Click on the website on which you want to disable Log File Analysis in the [Websites section](https://app.contentkingapp.com/account/websites?view=list) of Conductor Monitoring.
2. Click on the **Log File Analysis** in the **Settings** section.
3. Disable the **Log File Analysis** toggle.
Once this is done, Conductor Monitoring will automatically disable Cloudflare Logpush access to the AWS S3 bucket.
### Removing Cloudflare Logpush
If you have disabled the Log File Analysis feature, you still need to remove the Cloudflare Logpush service in your Cloudflare account.
This needs to be done manually, as Conductor Monitoring doesn't have access to your Cloudflare account.
### Security FAQs
For the most common security-related questions about Conductor Monitoring's Log File Analysis, refer to the FAQ section in the [Log File Analysis support article](/docs/monitoring/log-file-analysis-faqs/).
### Reinstalling Cloudflare Logpush
If you want to change the AWS S3 bucket region or reinstall Cloudflare Logpush, you can do it in the following way:
1. Click on the website on which you want to reinstall Cloudflare Logpush in the [Websites section](https://app.contentkingapp.com/account/websites?view=list) of Conductor Monitoring.
2. Click **Log File Analysis** in **Settings**, and then the **reinstall** link next to the **Cloudflare Logpush** delivery method in the **Log Sources**.
3. If needed change the region, and click on **Create bucket**.
4. Configure Cloudflare Logpush following [the steps above](#2-configuring-cloudflare-logpush).
## Disabling Log File Analysis
Same as with enabling Log File Analysis, you need to disable the feature in Conductor Monitoring and then remove the Cloudflare Logpush service in the Cloudflare UI.
### Disabling Log File Analysis
1. Click on the website on which you want to disable Log File Analysis in the [Websites section](https://app.contentkingapp.com/account/websites?view=list) of Conductor Monitoring.
2. Click on the **Log File Analysis** in the **Settings** section.
3. Disable the **Log File Analysis** toggle.
Once this is done, Conductor Monitoring will automatically disable Cloudflare Logpush access to the AWS S3 bucket.
### Removing Cloudflare Logpush
If you have disabled the Log File Analysis feature, you still need to remove the Cloudflare Logpush service in your Cloudflare account.
This needs to be done manually, as Conductor Monitoring doesn't have access to your Cloudflare account.
### Security FAQs
For the most common security-related questions about Conductor Monitoring's Log File Analysis, refer to the FAQ section in the [Log File Analysis support article](/docs/monitoring/log-file-analysis-faqs/).