> ## Documentation Index
> Fetch the complete documentation index at: https://www.conductor.com/docs/llms.txt
> Use this file to discover all available pages before exploring further.
# Creating and Maintaining Workspaces
> Workspaces are reports you can use to collect and share data from across the Conductor platform.
[Workspaces](/docs/platform/workspaces/) are reports you can use to collect and share data from across the Conductor platform. Use the instructions below to create, add to, and share workspaces.
## Create a workspace
You can create workspaces in two ways:
* [Create a workspace with Report Builder](/docs/platform/creating-and-maintaining-workspaces/#create-a-workspace-with-report-builder)
* [Create a custom workspace](/docs/platform/creating-and-maintaining-workspaces/#create-a-custom-workspace)
### Create a workspace with Report Builder
You can use Conductor's Report Builder to create smart, value-oriented workspaces tailored to particular digital marketing needs. Just enter some basic information about what you want the workspace to report on, review the outline of included widgets, and Conductor builds it with the click of a button.
1. [**Click here**](https://app.conductor.com/u/workspaces) or click **Workspaces** in the Conductor navigation.
2. Click a Report Builder option from the **Create a New Workspace** section at the top. Currently, the available options include:
* SEO Business Review
* Executive Summary
* New Content Opportunity
1. Depending on the option you selected in the previous step, the Report Builder provides different prompts for you to complete. Answer the questions and proceed through the steps on the left. Each answer helps define the data that will appear in the finished report, which you can see outlined on the right.
 2. When you have customized the workspace to your specifications, click **Create My Workspace**.
### Create a custom workspace
You can also create workspaces from scratch. These custom workspaces can be created in two different ways:
#### Create a custom workspace from Workspace Management
1. [**Click here**](https://app.conductor.com/u/workspaces) or click **Workspaces** in the Conductor navigation.
2. Click the **Blank Workspace** option. A form appears.
2. When you have customized the workspace to your specifications, click **Create My Workspace**.
### Create a custom workspace
You can also create workspaces from scratch. These custom workspaces can be created in two different ways:
#### Create a custom workspace from Workspace Management
1. [**Click here**](https://app.conductor.com/u/workspaces) or click **Workspaces** in the Conductor navigation.
2. Click the **Blank Workspace** option. A form appears.
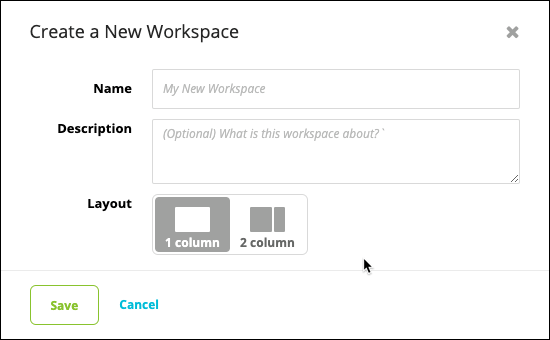 3. In the form, enter a name and a description, and choose whether you want the widgets laid out in one column or two.
4. Click **Save**. You can now add widgets from throughout Conductor—or [add custom widgets](/docs/platform/creating-and-maintaining-workspaces/#add-custom-content-to-a-workspace)—to the workspace.
#### Create a custom workspace from a report in Conductor
1. In a report in Conductor, find a widget you want to add to a workspace.
2. Depending on the report, you can
* Click the **Add to Workspace** button.
3. In the form, enter a name and a description, and choose whether you want the widgets laid out in one column or two.
4. Click **Save**. You can now add widgets from throughout Conductor—or [add custom widgets](/docs/platform/creating-and-maintaining-workspaces/#add-custom-content-to-a-workspace)—to the workspace.
#### Create a custom workspace from a report in Conductor
1. In a report in Conductor, find a widget you want to add to a workspace.
2. Depending on the report, you can
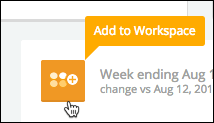
* Click the **Add to Workspace** button.
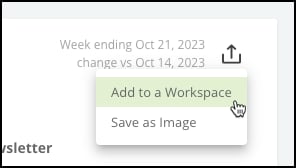
 * Click the **Share** icon and select **Add to a Workspace**.
 1. Complete the fields in the Add to workspace form:
* **Workspace**: Enter a name for the workspace you want to create.
* **Placement**: Choose whether you want the widget to appear in the left or right column of the workspace.
* **Title**: Enter a title for the widget.
* **Description**: Enter a description for the widget.
* **Report on**: Choose the time frame you want the widget to report on. Choices include:
* A preset or custom rolling time frame, such as **Last 7 days** or **Last 12 weeks**. Conductor will automatically update this over time to show the most recent data.
* A fixed start and end date. You might choose this to show the performance of a specific business quarter or fiscal year.
* A fixed start date with no end date. You might choose this to monitor an ongoing campaign.
* Note that, based on the available data, some reports in Conductor do not give you each choice listed above.
1. Click **Add**. Conductor creates the workspace.
## Add data from Conductor to a workspace
You can add data views (called widgets) from throughout Conductor to your workspaces to create custom reports tailored to your organization's needs.
1. Find a widget in Conductor you want to add to a workspace.
2. Depending on the report, you can
* Click the **Add to Workspace** button.
* Click the **Share** icon and select **Add to a Workspace**.
1. Complete the fields in the Add to workspace form:
* **Workspace**: Select the workspace you want to add the widget to. If you want to create a new workspace, enter a name for the workspace you want to create.
* **Placement**: Choose whether you want the widget to appear in the left or right column of the workspace.
* **Title**: Enter a title for the widget.
* **Description**: Enter a description for the widget.
* **Report on**: Choose the time frame you want the widget to report on. Choices include:
* A preset or custom time frame, such as **Last 7 days** or **Last 12 weeks**. Conductor will automatically update this over time to show the most recent data.
* A fixed start and end date. You might choose this to show the performance of a specific business quarter or fiscal year.
* A fixed start date with no end date. You might choose this to monitor an ongoing campaign.
* Note that, based on the available data, some reports in Conductor do not give you each choice listed above.
* **Include**: For widgets created from Explore modals in AI Search Performance, you can choose to include the chart, grid, or both from the modal you are adding data from.
* **Show data in table for**: Choose whether you want to include data from the **Entire time range** or just see the change between the **Start week vs end week**.
1. Click **Add**.
## Add custom content to a workspace
You can use custom widgets to add custom content to flesh out your workspaces. Possible uses for custom content include:
* Instructions and follow-ups for your clients.
* Images, videos, and other types of media to share.
* Links to resources and best practice documents.
To add a custom widget:
1. Open the workspace to which you want to add the custom widget.
2. Follow the path **Add** > **Custom Widget**. A new custom widget appears.
1. Complete the fields in the Add to workspace form:
* **Workspace**: Enter a name for the workspace you want to create.
* **Placement**: Choose whether you want the widget to appear in the left or right column of the workspace.
* **Title**: Enter a title for the widget.
* **Description**: Enter a description for the widget.
* **Report on**: Choose the time frame you want the widget to report on. Choices include:
* A preset or custom rolling time frame, such as **Last 7 days** or **Last 12 weeks**. Conductor will automatically update this over time to show the most recent data.
* A fixed start and end date. You might choose this to show the performance of a specific business quarter or fiscal year.
* A fixed start date with no end date. You might choose this to monitor an ongoing campaign.
* Note that, based on the available data, some reports in Conductor do not give you each choice listed above.
1. Click **Add**. Conductor creates the workspace.
## Add data from Conductor to a workspace
You can add data views (called widgets) from throughout Conductor to your workspaces to create custom reports tailored to your organization's needs.
1. Find a widget in Conductor you want to add to a workspace.
2. Depending on the report, you can
* Click the **Add to Workspace** button.
* Click the **Share** icon and select **Add to a Workspace**.
1. Complete the fields in the Add to workspace form:
* **Workspace**: Select the workspace you want to add the widget to. If you want to create a new workspace, enter a name for the workspace you want to create.
* **Placement**: Choose whether you want the widget to appear in the left or right column of the workspace.
* **Title**: Enter a title for the widget.
* **Description**: Enter a description for the widget.
* **Report on**: Choose the time frame you want the widget to report on. Choices include:
* A preset or custom time frame, such as **Last 7 days** or **Last 12 weeks**. Conductor will automatically update this over time to show the most recent data.
* A fixed start and end date. You might choose this to show the performance of a specific business quarter or fiscal year.
* A fixed start date with no end date. You might choose this to monitor an ongoing campaign.
* Note that, based on the available data, some reports in Conductor do not give you each choice listed above.
* **Include**: For widgets created from Explore modals in AI Search Performance, you can choose to include the chart, grid, or both from the modal you are adding data from.
* **Show data in table for**: Choose whether you want to include data from the **Entire time range** or just see the change between the **Start week vs end week**.
1. Click **Add**.
## Add custom content to a workspace
You can use custom widgets to add custom content to flesh out your workspaces. Possible uses for custom content include:
* Instructions and follow-ups for your clients.
* Images, videos, and other types of media to share.
* Links to resources and best practice documents.
To add a custom widget:
1. Open the workspace to which you want to add the custom widget.
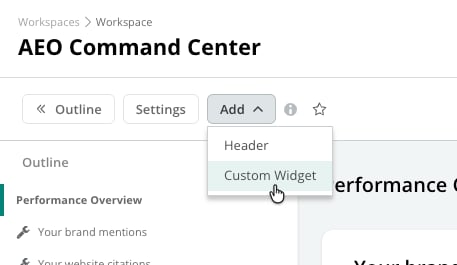
2. Follow the path **Add** > **Custom Widget**. A new custom widget appears.
 3. Enter a **Title** and **Description** for your custom widget.
4. Enter your custom content in the WYSIWYG editor.
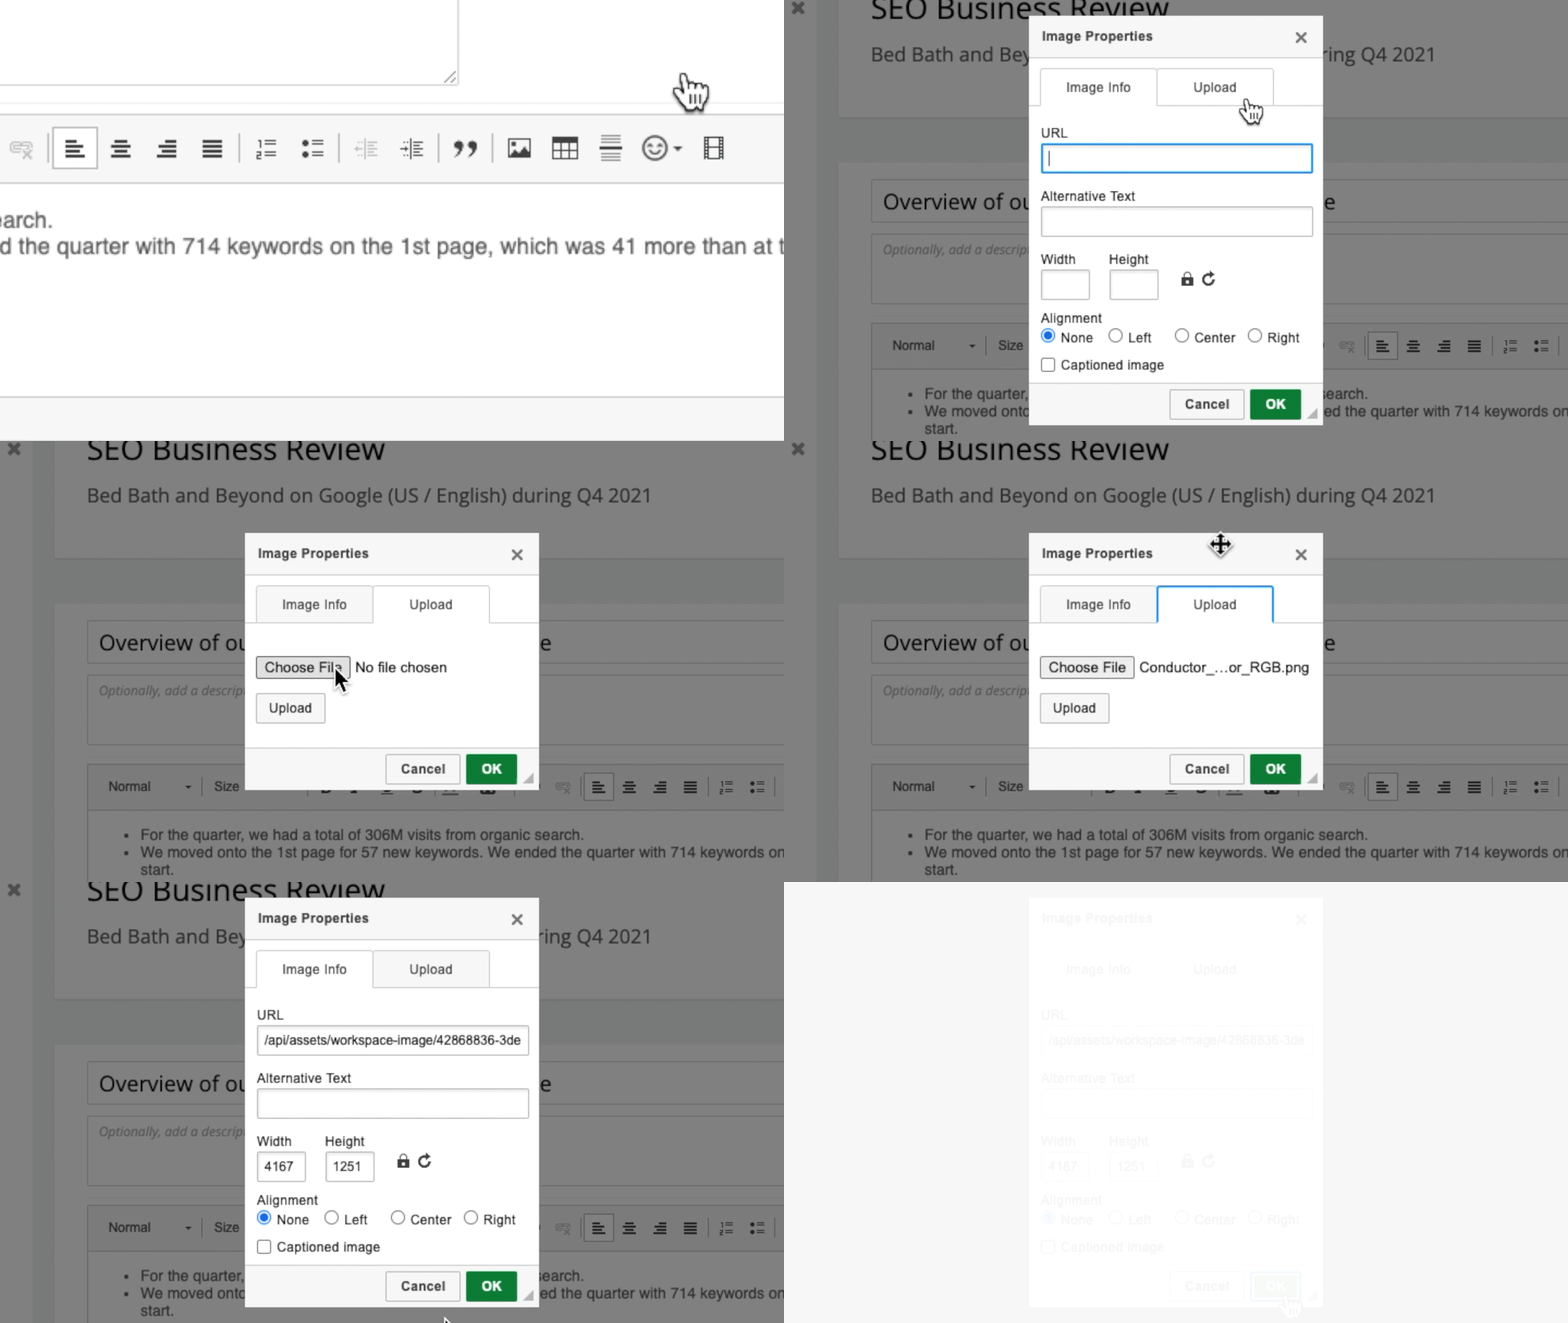
* Most often, you might want to embed an image. You can simply click to edit a custom widget, and then drag-and-drop an image directly into the WYSIWYG editor. Or, while editing, click the Image icon, go to the **Upload** tab, and choose an image file on your computer, and click **Upload**.
3. Enter a **Title** and **Description** for your custom widget.
4. Enter your custom content in the WYSIWYG editor.
* Most often, you might want to embed an image. You can simply click to edit a custom widget, and then drag-and-drop an image directly into the WYSIWYG editor. Or, while editing, click the Image icon, go to the **Upload** tab, and choose an image file on your computer, and click **Upload**.
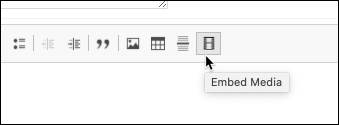
 * You can also embed learning and product videos, documents and spreadsheets, slide presentations—and more—directly inside a workspace in Conductor with the **Embed Media** button:
 * You might find other applications to embed information in custom widgets, but the applications listed below represent those applications whose embed codes Conductor specifically supports. See how to embed media from these applications in the following section below:
* YouTube
* SlideShare
* Vimeo
* Google Drive Document
* Google Drive Spreadsheet
* Google Drive Presentation
* Google Drive Drawing
1. Click **Save**.
## Embed different media into a custom widget
You can increase the impact of your Workspaces [by embedding other media in custom widgets](/docs/platform/creating-and-maintaining-workspaces/#embed-different-media-into-a-custom-widget). Here's how to embed media from a few supported sources:
### YouTube
1. Go to the specific video on [http://www.youtube.com](http://www.youtube.com) that you would like to embed.
2. Click on the **Share** button below the video.
3. Click on the **Embed** button below.
4. Copy the embed code that starts with "\ **Edit Widget** or open the custom widget you want to use.
7. Click the **Embed Media** button.
8. Paste the embed code into the **Paste Embed Code Here** field.
### SlideShare
1. Navigate to the specific SlideShare presentation that you would like to embed.
2. Click the embed button at the top of the presentation.
3. Copy the embed code that starts with "\ **Edit Widget** or open the custom widget you want to use.
6. Click the **Embed Media** button.
7. Paste the embed code into the **Paste Embed Code Here** field.
### Vimeo
1. Navigate to the specific Vimeo video that you would like to embed.
2. Click the **Share** button on the right hand side of the video
3. Copy the code that starts with "\ **Edit Widget** or open the custom widget you want to use.
6. Click the **Embed Media** button.
7. Paste the embed code into the **Paste Embed Code Here** field.
### Google Drive Document (Docs)
1. Open the Google Drive Document that you want to embed.
2. Go to **File** > **Publish to the Web.** The Publish to the Web window appears.
3. Click **Embed** and click **Publish**.
4. Click **OK** to confirm that you want to publish this document.
5. Copy the embed code below that starts with "\ **Edit Widget** or open the custom widget you want to use.
8. Click the **Embed Media** button.
9. Paste the embed code into the **Paste Embed Code Here** field. By default, the iframe appears as a small window when it is published. To have the embedded document appear using the whole width of the widget, enter the following highlighted text when you paste the embed code:
* You might find other applications to embed information in custom widgets, but the applications listed below represent those applications whose embed codes Conductor specifically supports. See how to embed media from these applications in the following section below:
* YouTube
* SlideShare
* Vimeo
* Google Drive Document
* Google Drive Spreadsheet
* Google Drive Presentation
* Google Drive Drawing
1. Click **Save**.
## Embed different media into a custom widget
You can increase the impact of your Workspaces [by embedding other media in custom widgets](/docs/platform/creating-and-maintaining-workspaces/#embed-different-media-into-a-custom-widget). Here's how to embed media from a few supported sources:
### YouTube
1. Go to the specific video on [http://www.youtube.com](http://www.youtube.com) that you would like to embed.
2. Click on the **Share** button below the video.
3. Click on the **Embed** button below.
4. Copy the embed code that starts with "\ **Edit Widget** or open the custom widget you want to use.
7. Click the **Embed Media** button.
8. Paste the embed code into the **Paste Embed Code Here** field.
### SlideShare
1. Navigate to the specific SlideShare presentation that you would like to embed.
2. Click the embed button at the top of the presentation.
3. Copy the embed code that starts with "\ **Edit Widget** or open the custom widget you want to use.
6. Click the **Embed Media** button.
7. Paste the embed code into the **Paste Embed Code Here** field.
### Vimeo
1. Navigate to the specific Vimeo video that you would like to embed.
2. Click the **Share** button on the right hand side of the video
3. Copy the code that starts with "\ **Edit Widget** or open the custom widget you want to use.
6. Click the **Embed Media** button.
7. Paste the embed code into the **Paste Embed Code Here** field.
### Google Drive Document (Docs)
1. Open the Google Drive Document that you want to embed.
2. Go to **File** > **Publish to the Web.** The Publish to the Web window appears.
3. Click **Embed** and click **Publish**.
4. Click **OK** to confirm that you want to publish this document.
5. Copy the embed code below that starts with "\ **Edit Widget** or open the custom widget you want to use.
8. Click the **Embed Media** button.
9. Paste the embed code into the **Paste Embed Code Here** field. By default, the iframe appears as a small window when it is published. To have the embedded document appear using the whole width of the widget, enter the following highlighted text when you paste the embed code:
 You can also configure how much vertical space you want to the embedded by entering a number of pixels as shown below:
 10. Click **OK**.
### Google Drive Spreadsheet (Sheets)
1. Open the Google Drive spreadsheet that you want to embed.
2. Go to **File** > **Publish to the Web**. The Publish to the Web window appears.
3. Click **Embed** and click **Publish**.
4. Click **OK** to confirm that you want to publish this document.
5. Copy the embed code below that starts with "\ **Edit Widget** or open the custom widget you want to use.
8. Click the **Embed Media** button.
9. Paste the embed code into the **Paste Embed Code Here** field. By default, the iframe appears as a small window when it is published. To have the embedded document appear using the whole width of the widget, enter the following highlighted text when you paste the embed code:
10. You can also configure how much vertical space you want to the embedded by entering a number of pixels as shown below:
11. Click **OK**.
### Google Drive Presentations (Slides)
1. Open the Google Drive Presentation that you want to embed.
2. Go to **File** > **Publish to the Web**. The Publish to the Web window appears.
3. Click **Embed** and click **Publish**.
4. Click **OK** to confirm that you want to publish this document.
5. Copy the embed code below that starts with "\ **Edit Widget** or open the custom widget you want to use.
8. Click the **Embed Media** button.
9. Paste the embed code into the **Paste Embed Code Here** field. By default, the iframe appears as a small window when it is published. To have the embedded document appear using the whole width of the widget, enter the following highlighted text when you paste the embed code:
10. You can also configure how much vertical space you want to the embedded by entering a number of pixels as shown below:
11. Click **OK**.
### Google Drive Drawings
1. Open the specific Google Drive Drawing that you would like to embed.
2. Go to **File** > **Publish to the Web**. The Publish to the Web window appears.
3. Click **Embed** and click **Publish**.
4. Click **OK** to confirm that you want to publish this document.
5. Copy the embed code below that starts with "\ **Edit Widget** or open the custom widget you want to use.
8. Click the **Embed Media** button.
9. Paste the embed code into the **Paste Embed Code Here** field. By default, the iframe appears as a small window when it is published. To have the embedded document appear using the whole width of the widget, enter the following highlighted text when you paste the embed code:
10.
You can also configure how much vertical space you want to the embedded by entering a number of pixels as shown below:
11. Click **OK**.
## Share a workspace with stakeholders
Using workspaces is a great way to review your data, but you can use workspaces to communicate your performance across your team and throughout your organization.
You can send a workspace to others inside or outside your organization. You can send these workspaces on-demand or schedule delivery to your recipients in Conductor.
When you send a workspace from Conductor:
* The recipient receives an email notification that includes a PDF of the workspace.
* If the recipient is a Conductor user in your account, you will also receive an in-app notification that appears in the **Notifications** menu.
### Download a workspace
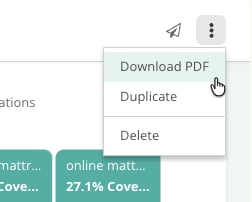
You can download a workspace and share outside of Conductor, such as your workplace messaging app or work management apps. Just click the three-dot icon in the top-right of your workspace and select **Download PDF**.
10. Click **OK**.
### Google Drive Spreadsheet (Sheets)
1. Open the Google Drive spreadsheet that you want to embed.
2. Go to **File** > **Publish to the Web**. The Publish to the Web window appears.
3. Click **Embed** and click **Publish**.
4. Click **OK** to confirm that you want to publish this document.
5. Copy the embed code below that starts with "\ **Edit Widget** or open the custom widget you want to use.
8. Click the **Embed Media** button.
9. Paste the embed code into the **Paste Embed Code Here** field. By default, the iframe appears as a small window when it is published. To have the embedded document appear using the whole width of the widget, enter the following highlighted text when you paste the embed code:
10. You can also configure how much vertical space you want to the embedded by entering a number of pixels as shown below:
11. Click **OK**.
### Google Drive Presentations (Slides)
1. Open the Google Drive Presentation that you want to embed.
2. Go to **File** > **Publish to the Web**. The Publish to the Web window appears.
3. Click **Embed** and click **Publish**.
4. Click **OK** to confirm that you want to publish this document.
5. Copy the embed code below that starts with "\ **Edit Widget** or open the custom widget you want to use.
8. Click the **Embed Media** button.
9. Paste the embed code into the **Paste Embed Code Here** field. By default, the iframe appears as a small window when it is published. To have the embedded document appear using the whole width of the widget, enter the following highlighted text when you paste the embed code:
10. You can also configure how much vertical space you want to the embedded by entering a number of pixels as shown below:
11. Click **OK**.
### Google Drive Drawings
1. Open the specific Google Drive Drawing that you would like to embed.
2. Go to **File** > **Publish to the Web**. The Publish to the Web window appears.
3. Click **Embed** and click **Publish**.
4. Click **OK** to confirm that you want to publish this document.
5. Copy the embed code below that starts with "\ **Edit Widget** or open the custom widget you want to use.
8. Click the **Embed Media** button.
9. Paste the embed code into the **Paste Embed Code Here** field. By default, the iframe appears as a small window when it is published. To have the embedded document appear using the whole width of the widget, enter the following highlighted text when you paste the embed code:
10.
You can also configure how much vertical space you want to the embedded by entering a number of pixels as shown below:
11. Click **OK**.
## Share a workspace with stakeholders
Using workspaces is a great way to review your data, but you can use workspaces to communicate your performance across your team and throughout your organization.
You can send a workspace to others inside or outside your organization. You can send these workspaces on-demand or schedule delivery to your recipients in Conductor.
When you send a workspace from Conductor:
* The recipient receives an email notification that includes a PDF of the workspace.
* If the recipient is a Conductor user in your account, you will also receive an in-app notification that appears in the **Notifications** menu.
### Download a workspace
You can download a workspace and share outside of Conductor, such as your workplace messaging app or work management apps. Just click the three-dot icon in the top-right of your workspace and select **Download PDF**.
 ### Share a workspace once
To share a workspace on-demand:
1. Follow the path **Send** (paper plane) icon > **Send now**. The **Email Workspace** form appears.
### Share a workspace once
To share a workspace on-demand:
1. Follow the path **Send** (paper plane) icon > **Send now**. The **Email Workspace** form appears.
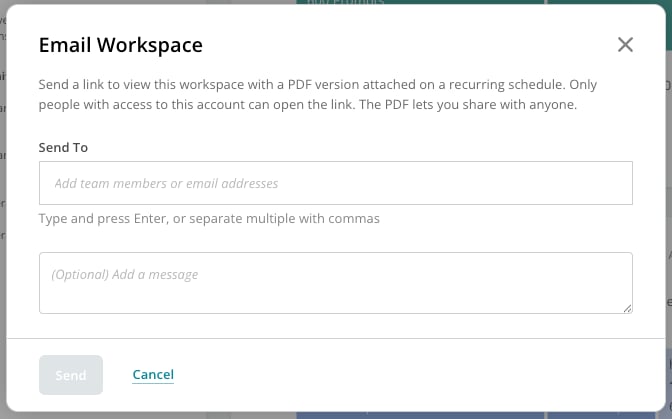 2. In the **Send To** field, enter the users in Conductor or email addresses of the recipients to whom you want to send this workspace.
3. If you want, you can add a message to accompany the workspace.
4. Click **Send**.
### Schedule a workspace to be sent regularly
You can schedule a workspace to be sent regularly. Note that Conductor's creation of PDF workspaces is dynamic and happens automatically, but the following tips help you create well-formatted workspaces that are regularly converted to PDFs:
* Keep tables so they fit in a full-screen browser set to 1440 x 900. If a table in a workspace contains too many columns to display in Conductor, the columns also appear cut-off in the printed PDF version of the workspace.
* Any widget that exceeds an entire page's width or length will be removed in the PDF. For example:
* A custom widget with an image wider than 1500 pixels or higher than 900 pixels will be removed.
* A custom widget with more than 5000 characters of text at a 12 point font will likely be removed.
* Workspaces with more than 15 widgets will likely not download as PDFs correctly. If you have a workspace with more than 15 widgets, we recommend that you split those widgets across multiple workspaces for PDFs.
Here's how you schedule workspace delivery:
1. From **Workspaces**, click the toggle next to the workspace you want to send.
2. In the **Send To** field, enter the users in Conductor or email addresses of the recipients to whom you want to send this workspace.
3. If you want, you can add a message to accompany the workspace.
4. Click **Send**.
### Schedule a workspace to be sent regularly
You can schedule a workspace to be sent regularly. Note that Conductor's creation of PDF workspaces is dynamic and happens automatically, but the following tips help you create well-formatted workspaces that are regularly converted to PDFs:
* Keep tables so they fit in a full-screen browser set to 1440 x 900. If a table in a workspace contains too many columns to display in Conductor, the columns also appear cut-off in the printed PDF version of the workspace.
* Any widget that exceeds an entire page's width or length will be removed in the PDF. For example:
* A custom widget with an image wider than 1500 pixels or higher than 900 pixels will be removed.
* A custom widget with more than 5000 characters of text at a 12 point font will likely be removed.
* Workspaces with more than 15 widgets will likely not download as PDFs correctly. If you have a workspace with more than 15 widgets, we recommend that you split those widgets across multiple workspaces for PDFs.
Here's how you schedule workspace delivery:
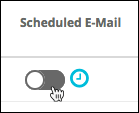
1. From **Workspaces**, click the toggle next to the workspace you want to send.
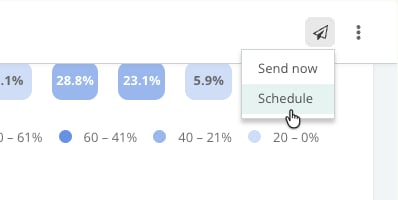
 Alternatively, in an individual workspace, click the path **Send** (paper plane) icon and select **Schedule**.
 A form appears.
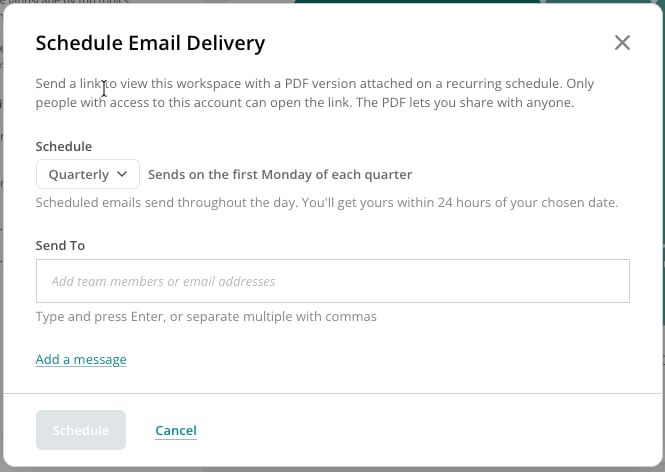 2. Complete the form:
* From the \*\*Schedule \*\*menu, select the frequency at which you want the workspace to be delivered. You can choose any of the following frequencies:
* **Daily**. This option delivers the workspace daily.
* **Weekly**. This option delivers the workspace once per week. You can also choose the day on which you want the workspace delivered.
* **Monthly**. This option delivers the workspace on the first Monday of each month.
* **Quarterly**. This option delivers the workspace on the first Monday of each quarter.
* In the **Send To** section, select the recipients from your Conductor account you'd like to receive the workspace. If you want to send the workspace to non-Conductor users, you can also enter those names and emails.
* Optionally, add a message.
1. Click **Schedule** to schedule the workspace delivery.
### Edit a scheduled delivery
If you need to edit a previously scheduled workspace:
From the **Workspaces** menu:
1. [**Click here**](https://app.conductor.com/u/workspaces) or click **Workspaces** in the Conductor navigation.
2. Find the workspace for which you want to update the scheduled delivery.
3. Click the **Clock** icon next to the **Scheduled E-Mail** toggle to open the **Schedule E-mail Delivery** form.
2. Complete the form:
* From the \*\*Schedule \*\*menu, select the frequency at which you want the workspace to be delivered. You can choose any of the following frequencies:
* **Daily**. This option delivers the workspace daily.
* **Weekly**. This option delivers the workspace once per week. You can also choose the day on which you want the workspace delivered.
* **Monthly**. This option delivers the workspace on the first Monday of each month.
* **Quarterly**. This option delivers the workspace on the first Monday of each quarter.
* In the **Send To** section, select the recipients from your Conductor account you'd like to receive the workspace. If you want to send the workspace to non-Conductor users, you can also enter those names and emails.
* Optionally, add a message.
1. Click **Schedule** to schedule the workspace delivery.
### Edit a scheduled delivery
If you need to edit a previously scheduled workspace:
From the **Workspaces** menu:
1. [**Click here**](https://app.conductor.com/u/workspaces) or click **Workspaces** in the Conductor navigation.
2. Find the workspace for which you want to update the scheduled delivery.
3. Click the **Clock** icon next to the **Scheduled E-Mail** toggle to open the **Schedule E-mail Delivery** form.
 4. Make the changes you want to the delivery details.
5. Click **Schedule** to schedule the workspace delivery.
From a workspace:
1. Click the **Send** (paper plane) icon. You'll notice that the workspace has an active schedule if there is a green indicator next to the **Schedule** option.
4. Make the changes you want to the delivery details.
5. Click **Schedule** to schedule the workspace delivery.
From a workspace:
1. Click the **Send** (paper plane) icon. You'll notice that the workspace has an active schedule if there is a green indicator next to the **Schedule** option.
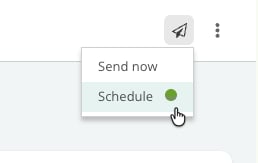 2. Click **Schedule**. The **Schedule Email Delivery** form appears.
3. Make the changes you want to the delivery details.
4. Click **Update Schedule** to schedule the workspace delivery.
### Cancel a scheduled delivery
To cancel a previously scheduled workspace, perform one of the following actions:
From the **Workspaces** menu:
1. [**Click here**](https://app.conductor.com/u/workspaces) or click **Workspaces** in the Conductor navigation.
2. Find the workspace for which you want to update the scheduled delivery.
3. Click the **Clock** icon next to the **Scheduled E-Mail** toggle to open the **Schedule E-mail Delivery** form.
* Click the toggle next to the workspace in the list to turn off the scheduled deliveries.
2. Click **Schedule**. The **Schedule Email Delivery** form appears.
3. Make the changes you want to the delivery details.
4. Click **Update Schedule** to schedule the workspace delivery.
### Cancel a scheduled delivery
To cancel a previously scheduled workspace, perform one of the following actions:
From the **Workspaces** menu:
1. [**Click here**](https://app.conductor.com/u/workspaces) or click **Workspaces** in the Conductor navigation.
2. Find the workspace for which you want to update the scheduled delivery.
3. Click the **Clock** icon next to the **Scheduled E-Mail** toggle to open the **Schedule E-mail Delivery** form.
* Click the toggle next to the workspace in the list to turn off the scheduled deliveries.
 1. Click **Yes, turn off** to confirm.
From a workspace:
1. Click the **Send** (paper plane) icon. You'll notice that the workspace has an active schedule if there is a green indicator next to the **Schedule** option.
2. Click **Schedule**. The **Schedule Email Delivery** form appears.
3. Click the **Scheduled Sending** toggle to disable the scheduled email.
4. Click **Update Schedule**
## Organize your workspaces with folders
The more workspaces you create the more you'll need ways to keep them organized. You can create folders to house your workspaces in ways that make sense to your organization.
### To create a folder:
1. [**Click here**](https://app.conductor.com/u/workspaces) or click **Workspaces** in the Conductor navigation.
2. Click **New Folder**. A new unnamed folder appears at the top of the table.
1. Click **Yes, turn off** to confirm.
From a workspace:
1. Click the **Send** (paper plane) icon. You'll notice that the workspace has an active schedule if there is a green indicator next to the **Schedule** option.
2. Click **Schedule**. The **Schedule Email Delivery** form appears.
3. Click the **Scheduled Sending** toggle to disable the scheduled email.
4. Click **Update Schedule**
## Organize your workspaces with folders
The more workspaces you create the more you'll need ways to keep them organized. You can create folders to house your workspaces in ways that make sense to your organization.
### To create a folder:
1. [**Click here**](https://app.conductor.com/u/workspaces) or click **Workspaces** in the Conductor navigation.
2. Click **New Folder**. A new unnamed folder appears at the top of the table.
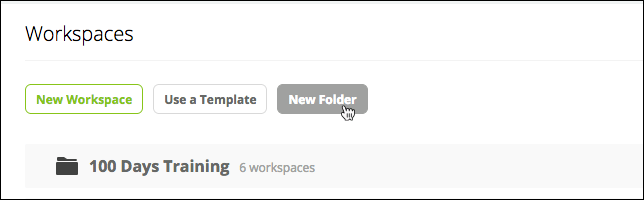 3. Enter a name for your folder.
4. Click **Save**. The folder appears in your table of workspaces.
### To edit the name of the folder:
1. [**Click here**](https://app.conductor.com/u/workspaces) or click **Workspaces** in the Conductor navigation.
2. Find the folder you want to re-name.
3. Click the **Edit** icon and select **Edit Name**.
3. Enter a name for your folder.
4. Click **Save**. The folder appears in your table of workspaces.
### To edit the name of the folder:
1. [**Click here**](https://app.conductor.com/u/workspaces) or click **Workspaces** in the Conductor navigation.
2. Find the folder you want to re-name.
3. Click the **Edit** icon and select **Edit Name**.
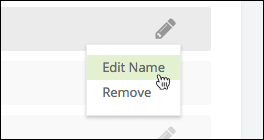 4. Enter your new name.
5. Click **Save**.
### To add workspaces to a folder:
1. [**Click here**](https://app.conductor.com/u/workspaces) or click **Workspaces** in the Conductor navigation.
2. Find the workspace you want to add to a folder.
3. Click the **Edit** icon (
4. Enter your new name.
5. Click **Save**.
### To add workspaces to a folder:
1. [**Click here**](https://app.conductor.com/u/workspaces) or click **Workspaces** in the Conductor navigation.
2. Find the workspace you want to add to a folder.
3. Click the **Edit** icon ( ).
4. In the menu that appears, select the folder to which you want to add the workspace.
5. Click the **Edit Mode** button to save your changes.
## Add or remove a favorite workspace
To make it easier to access the workspaces that matter most to you, you can add workspaces as personal favorites, so they appear in your workspaces menu. You can add as many as five workspaces as favorites at any given time.
).
4. In the menu that appears, select the folder to which you want to add the workspace.
5. Click the **Edit Mode** button to save your changes.
## Add or remove a favorite workspace
To make it easier to access the workspaces that matter most to you, you can add workspaces as personal favorites, so they appear in your workspaces menu. You can add as many as five workspaces as favorites at any given time.
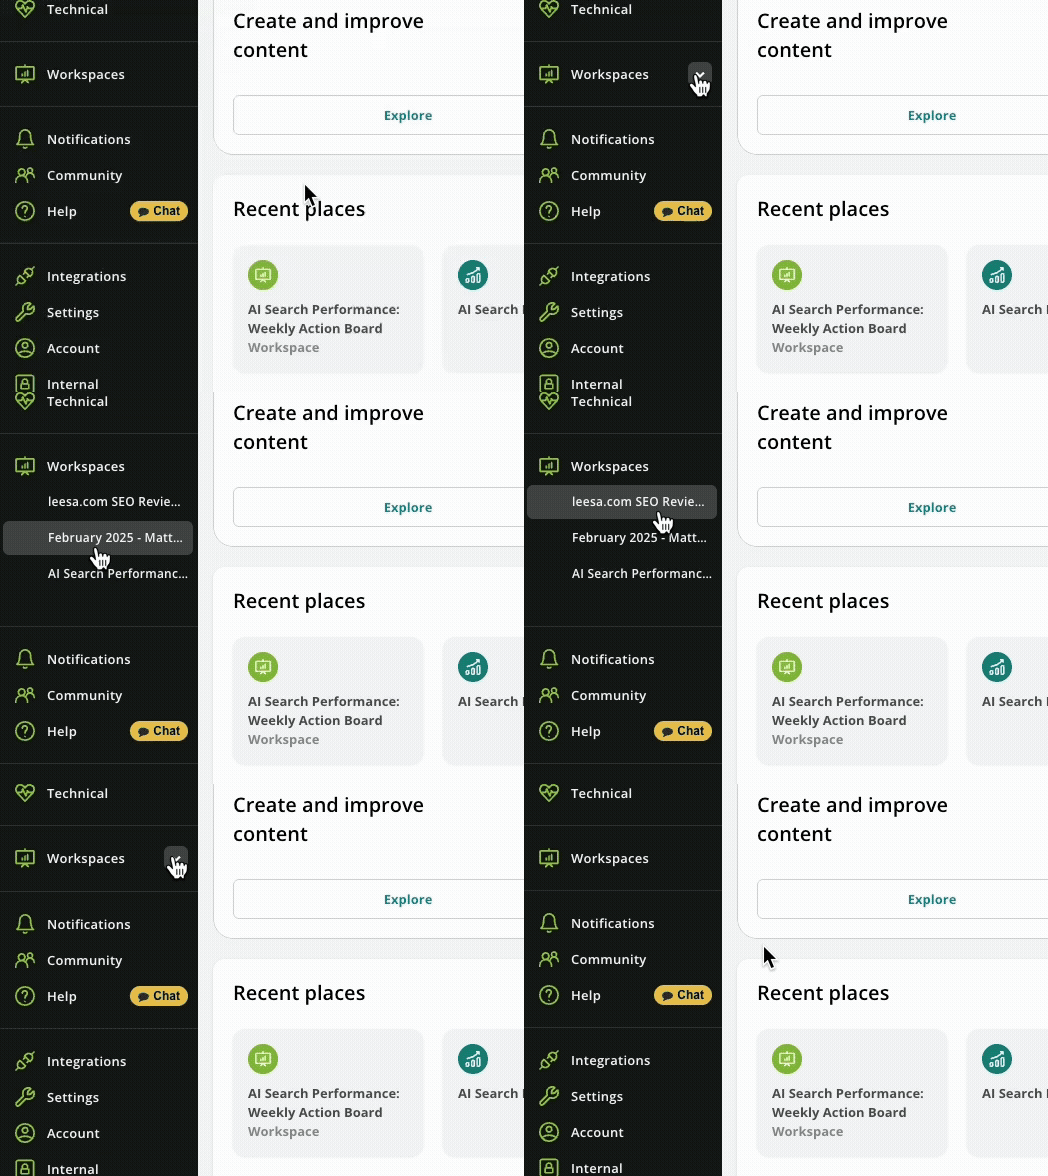 ### Add a workspace as a favorite
You can tag a workspace as a favorite in two ways: from **Workspaces** and from individual workspaces themselves.
To do this from **Workspaces**:
1. [**Click here**](https://app.conductor.com/u/workspaces) or click **Workspaces** in the Conductor navigation.
2. Hover over the workspace you want to tag as a favorite. A gray **star icon** appears.
### Add a workspace as a favorite
You can tag a workspace as a favorite in two ways: from **Workspaces** and from individual workspaces themselves.
To do this from **Workspaces**:
1. [**Click here**](https://app.conductor.com/u/workspaces) or click **Workspaces** in the Conductor navigation.
2. Hover over the workspace you want to tag as a favorite. A gray **star icon** appears.
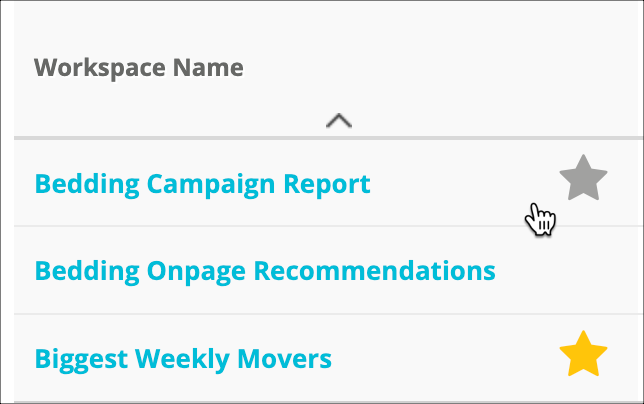 3. Click the **star icon**. The icon turns gold and the workspace appears in the **Workspaces** menu as a favorite.
To do this from an individual workspace:
1. [**Click here**](https://app.conductor.com/u/workspaces) or click **Workspaces** in the Conductor navigation.
2. Open the workspace you want to tag as a favorite.
3. At the top, click the **star icon**.
3. Click the **star icon**. The icon turns gold and the workspace appears in the **Workspaces** menu as a favorite.
To do this from an individual workspace:
1. [**Click here**](https://app.conductor.com/u/workspaces) or click **Workspaces** in the Conductor navigation.
2. Open the workspace you want to tag as a favorite.
3. At the top, click the **star icon**.
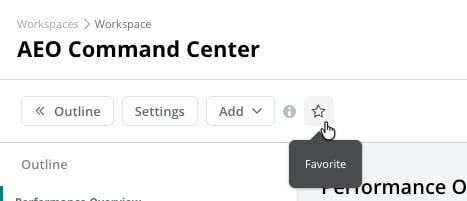 The icon turns blue and the workspace appears in the **Workspaces** menu as a favorite.
### Remove a workspace as a Favorite
1. [**Click here**](https://app.conductor.com/u/workspaces) or click **Workspaces** in the Conductor navigation.
2. Locate the workspace in the menu that you want to remove as a favorite.
3. Click the **gold star** icon.
The icon turns blue and the workspace appears in the **Workspaces** menu as a favorite.
### Remove a workspace as a Favorite
1. [**Click here**](https://app.conductor.com/u/workspaces) or click **Workspaces** in the Conductor navigation.
2. Locate the workspace in the menu that you want to remove as a favorite.
3. Click the **gold star** icon.
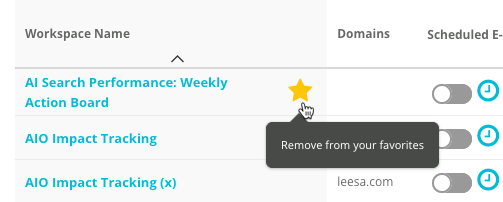 #### From an individual workspace
1. [**Click here**](https://app.conductor.com/u/workspaces) or click **Workspaces** in the Conductor navigation.
2. Open the workspace that you want to remove as a favorite.
3. At the top, click the **blue star** icon.
#### From an individual workspace
1. [**Click here**](https://app.conductor.com/u/workspaces) or click **Workspaces** in the Conductor navigation.
2. Open the workspace that you want to remove as a favorite.
3. At the top, click the **blue star** icon.
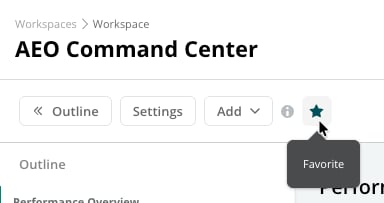 ## Edit a workspace
You can edit several characteristics of workspaces and the widgets that make them up.
### Edit high-level details about a workspace
1. [**Click here**](https://app.conductor.com/u/workspaces) or click **Workspaces** in the Conductor navigation.
2. Open the workspace you want to edit.
3. Click\*\* Settings\*\*.
## Edit a workspace
You can edit several characteristics of workspaces and the widgets that make them up.
### Edit high-level details about a workspace
1. [**Click here**](https://app.conductor.com/u/workspaces) or click **Workspaces** in the Conductor navigation.
2. Open the workspace you want to edit.
3. Click\*\* Settings\*\*.
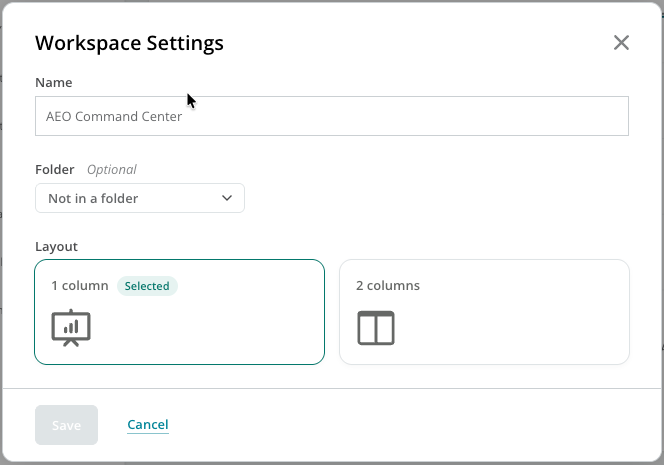 You can make changes to any of the following attributes:
* **Name**
* **Folder**
* **Layout**
1. Click **Save**.
### Move a widget in a workspace
1. [**Click here**](https://app.conductor.com/u/workspaces) or click **Workspaces** in the Conductor navigation.
2. Open the workspace where the widget you want to edit is.
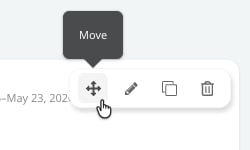
3. Hover over the widget, and then click and hold **Move** to drag-and-drop the widget where you want it:
You can make changes to any of the following attributes:
* **Name**
* **Folder**
* **Layout**
1. Click **Save**.
### Move a widget in a workspace
1. [**Click here**](https://app.conductor.com/u/workspaces) or click **Workspaces** in the Conductor navigation.
2. Open the workspace where the widget you want to edit is.
3. Hover over the widget, and then click and hold **Move** to drag-and-drop the widget where you want it:
 ### Edit a widget in a workspace
1. [**Click here**](https://app.conductor.com/u/workspaces) or click **Workspaces** in the Conductor navigation.
2. Open the workspace where the widget you want to edit is.
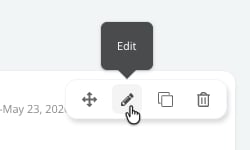
3. Hover over the widget and click **Edit**:
### Edit a widget in a workspace
1. [**Click here**](https://app.conductor.com/u/workspaces) or click **Workspaces** in the Conductor navigation.
2. Open the workspace where the widget you want to edit is.
3. Hover over the widget and click **Edit**:
 4. Make your changes. Depending on the widget, you can make changes to different details. For example, if a widget reports on a particular keyword group, Conductor allows you to edit the keyword group.
5. Click **Save**.
### Duplicate a widget in a workspace
You might want to duplicate and then edit a widget to compare data across different dimension of the same data. For example, you might duplicate a widget that includes keyword data for a specific keyword group. Then, you could edit the new widget to show data for a different keyword group so that you can compare the two keyword groups' performance.
1. [**Click here**](https://app.conductor.com/u/workspaces) or click **Workspaces** in the Conductor navigation.
2. Open the workspace where the widget you want to duplicate is.
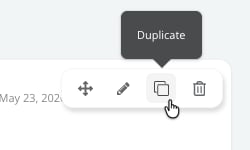
3. Hover over the widget and click **Duplicate**.
4. Make your changes. Depending on the widget, you can make changes to different details. For example, if a widget reports on a particular keyword group, Conductor allows you to edit the keyword group.
5. Click **Save**.
### Duplicate a widget in a workspace
You might want to duplicate and then edit a widget to compare data across different dimension of the same data. For example, you might duplicate a widget that includes keyword data for a specific keyword group. Then, you could edit the new widget to show data for a different keyword group so that you can compare the two keyword groups' performance.
1. [**Click here**](https://app.conductor.com/u/workspaces) or click **Workspaces** in the Conductor navigation.
2. Open the workspace where the widget you want to duplicate is.
3. Hover over the widget and click **Duplicate**.
 ### Delete a widget from a workspace
1. [**Click here**](https://app.conductor.com/u/workspaces) or click **Workspaces** in the Conductor navigation.
2. Open the workspace where the widget you want to delete is.
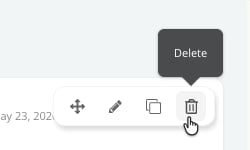
3. Hover over the widget and click **Delete**:
### Delete a widget from a workspace
1. [**Click here**](https://app.conductor.com/u/workspaces) or click **Workspaces** in the Conductor navigation.
2. Open the workspace where the widget you want to delete is.
3. Hover over the widget and click **Delete**:
 4. Confirm your deletion.
## Duplicate a workspace
If you have a workspace you'd like to use for another person or purpose, you can duplicate it and modify it to meet your needs. This way, you can keep your old workspace and re-purpose the copy, similar to doing a Save As in other programs.
1. [**Click here**](https://app.conductor.com/u/workspaces) or click **Workspaces** in the Conductor navigation.
2. Open the workspace you want to duplicate.
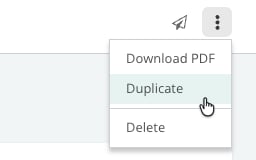
3. In the top-right of the workspace, click the three-dot icon and select **Duplicate**. The **Duplicate Workspace** form appears.
4. Confirm your deletion.
## Duplicate a workspace
If you have a workspace you'd like to use for another person or purpose, you can duplicate it and modify it to meet your needs. This way, you can keep your old workspace and re-purpose the copy, similar to doing a Save As in other programs.
1. [**Click here**](https://app.conductor.com/u/workspaces) or click **Workspaces** in the Conductor navigation.
2. Open the workspace you want to duplicate.
3. In the top-right of the workspace, click the three-dot icon and select **Duplicate**. The **Duplicate Workspace** form appears.
 4. In the \*\*Name \*\*field, re-title the workspace as needed.
5. Optionally, give the workspace a **Description** and choose a **Folder** location for the new workspace.
6. Click **Duplicate**.
## Delete a workspace
Don't need a workspace anymore? You can delete them from Conductor in two ways:
* From **Workspaces**:
1. [**Click here**](https://app.conductor.com/u/workspaces) or click **Workspaces** in the Conductor navigation.
2. Find the workspace you want to delete.
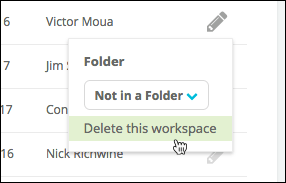
3. Click the **Edit** icon and select **Delete this workspace**.
4. In the \*\*Name \*\*field, re-title the workspace as needed.
5. Optionally, give the workspace a **Description** and choose a **Folder** location for the new workspace.
6. Click **Duplicate**.
## Delete a workspace
Don't need a workspace anymore? You can delete them from Conductor in two ways:
* From **Workspaces**:
1. [**Click here**](https://app.conductor.com/u/workspaces) or click **Workspaces** in the Conductor navigation.
2. Find the workspace you want to delete.
3. Click the **Edit** icon and select **Delete this workspace**.
 * From an individual workspace:
1. [**Click here**](https://app.conductor.com/u/workspaces) or click **Workspaces** in the Conductor navigation.
2. Open the workspace you want to delete.
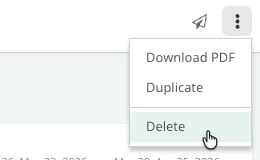
3. In the top-right, click the three-dot icon and select **Delete**.
* From an individual workspace:
1. [**Click here**](https://app.conductor.com/u/workspaces) or click **Workspaces** in the Conductor navigation.
2. Open the workspace you want to delete.
3. In the top-right, click the three-dot icon and select **Delete**.
 4. Confirm that you want to delete the workspace.